Tag wpdev (28)
Windows Phone: including ads in your Universal app, and using In-App Purchasing to turn them off
Mood: busy
Posted on 2014-09-27 15:03:00
Tags: windowsphone wpdev
Words: 824
Free apps are wildly more popular than paid apps, but some people (myself included) get annoyed at ads in apps. To get the best of both worlds, you can include ads in your free app but let people in-app purchase a way to turn them off. Here's how to do this in a Universal app (see how to do this in WP 8.0), and for an example, check out the Universal app Float to Hex!
Part 1: Adding advertising
Unfortunately there aren't a ton of ad APIs that support Windows Phone 8.1 Universal apps at the time of this writing - the only ones I found are Microsoft pubCenter, AdDuplex, and Smaato. I went with Microsoft pubCenter - here's where you can download the Windows Phone API and the Windows API.
You can follow the guides at those links for a step-by-step walkthrough to add ads to the Windows and Windows Phone version of your app.
--
Now the ads in your app should be working! Launch it and make sure that they appear and don't obscure any content.
Part 2: Using In-App Purchasing to Disable Ads
1. Log in to the Windows Phone Dev Center, click "Dashboard" (at the top), then "Submit App" on the left. Under the "App info" section, give your app a name and category, then Save. (you can change these when you're ready to submit for real) Go back to the dashboard, select your new app, and go to the "Products" section. Click "Add in-app product". For the product info, specify whatever you want for the product alias, but beware - don't use any spaces or special characters so you can use the same one on Windows! (for Float to Hex I used "FloatToHexNoAds" for the alias and product identifier) Set the type to "Durable", select the price, and click Save. Then specify a title and description - for the icon, feel free to use this:
 (click for full-sized image)
Finally, submit the product. Since your app isn't published yet, it won't be visible to anyone else.
2. Repeat step 1 on the Windows Dev Center.
Now you need to check for the in-app purchase and hide the ad if so. One way is to do this declaratively using data binding, and it's arguably a bit cleaner than the way below. Up to you!
3. Either create a Utils class or add this code to an existing one:
public static bool ShowAds { get; set; }

public static void UpdateInAppPurchases()

{

    ShowAds = true;

    var allLicenses = Windows.ApplicationModel.Store.

        CurrentApp.LicenseInformation.ProductLicenses;

    if (allLicenses.ContainsKey("FloatToHexNoAds"))

    {

        var license = allLicenses["FloatToHexNoAds"];

        if (license.IsActive)

        {

            ShowAds = false;

        }

    }

}

public static async Task RemoveAds(Action updateAd)

{

    try

    {

        await Windows.ApplicationModel.Store.CurrentApp

            .RequestProductPurchaseAsync("FloatToHexNoAds");

        UpdateInAppPurchases();

        updateAd();

    }

    catch (Exception)

    {

        // oh well

    }

}
In App.xaml.cs, add a call to Utils.UpdateInAppPurchases() to the OnLaunched() and OnActivated() methods.
4. Find all of the ads you added in XAML, and add Visibility="Collapsed" to them. Then, to each page that has an ad, add this method:
public void UpdateAd()

{

    Ad.Visibility = Utils.ShowAds ? Visibility.Visible : Visibility.Collapsed;

}
and add a call to UpdateAd() to the NavigationHelper_LoadState() method.
5. All that's left now is to add the option to remove ads from inside the app. If you'd like to add a menu item in the app bar, you can add the following XAML in both Windows and Windows Phone:
<Page.BottomAppBar>

    <CommandBar x:Name="AdUpgradeBar">

        <AppBarButton Label="remove ads" Icon="Remove" Click="RemoveAds_Click"

            x:Name="RemoveAdsButton"/>

    </CommandBar>

</Page.BottomAppBar>
Or, you can add a button in your about page, or both.
Then, add the event handler:
private async void RemoveAds_Click(object sender, EventArgs e)

{

    await Utils.RemoveAds(UpdateAd);

}
Finally, to remove the menu item from the page if the user has already removed the ads, add this code to your UpdateAd() method:
    RemoveAdsButton.Visibility =

        Utils.ShowAds ? Visibility.Visible : Visibility.Collapsed;
6. (optional) If you'd like to back up the In-App Purchases, you can back them up in the app settings. This isn't strictly necessary, but if the In-App Purchasing system gets messed up again your app will be covered.
--
To test the in-app purchasing code, you'll need to publish your app as a beta. (all in-app purchases are free in a beta) But, other than that, you're done!
One final warning: With Universal apps, you publish the Windows and Windows Phone version separately, and then apparently it detects the the apps are Universal. When I published Float to Hex, the Windows version detected that it was Universal almost immediately, but it took 36 hours for the Windows Phone version to show that it was Universal. So don't panic for a few days like I did!
References: Windows Phone blog post on In-App Purchasing
In-App Purchase: Success stories and Tips to test common in-app failure scenarios
Dev Center now open for Windows Phone 8.1 and universal Windows app submissions
--
See all my Windows Phone development posts. I also send out a monthly-or-so email with news for developers - check out the latest email and sign up here!
I'm planning on writing more posts about Windows Phone development - what would you like to hear about? Reply here, on twitter at @gregstoll, or by email at greg@gregstoll.com.
0 comments
Windows Phone Developer News - Dev Center Benefits, Unity promotion, paying your "taxes"
Mood: relaxed
Posted on 2014-09-01 12:08:00
Tags: newsletter wpdev
Words: 32
I just sent out my first Windows Phone Developer News! Check it out: Windows Phone Developer News - Dev Center Benefits, Unity promotion, paying your "taxes" (you can also subscribe at that link)
0 comments
Windows Phone: paying your "taxes", or a checklist before releasing an app
Mood: happy
Posted on 2014-08-23 16:15:00
Tags: windowsphone wpdev
Words: 830
Raymond Chen of The Old New Thing has a great post about paying your "taxes" as a Win32 developer, meaning you have to worry about features of the OS that your app may not be directly calling, but your users might be using. (examples are roaming user profiles, Fast User Switching, Hierarchical Storage Management, etc.) Here are more of his articles about "taxes".
So: what are the "taxes" in Universal app development for Windows/Windows Phone? Here's the list I came up with, and you can use this as a checklist before releasing a new app. Before you get discouraged at the length of the list, a lot of these are fairly easy to do!
WP means Windows Phone only and Win means Windows only, otherwise it applies to both.
Must haves:
(this doesn't mean that you have to support these, but you should be aware of them and disable support if your app doesn't play nicely)- WP: Themes - make sure to test your app in both a light and dark theme. (info about themes, including a good list of theme resources that should work in both themes. Note that those links say they only apply to WP 8.1 Silverlight, but I believe they apply to XAML apps as well)
- Suspend/resume - in XAML apps this is pretty easy to do, just save your state in e.PageState in the navigationHelper_SaveState() method and restore it in navigationHelper_LoadState(). (see how to trigger suspend/resume events in Visual Studio for testing purposes)
- Win: Resizing and snapped mode - the user can resize your app to a minimum of 500px. If you want, you can allow the user to resize it down the 320px if that makes sense for your app. (see how to handle resizing - the usual way is to trigger a VisualStateManager change and use Storyboards in XAML to move things around or resize things)
- Orientation: In both Win and WP, your app can be used in portrait or landscape mode by default. If it doesn't look good in one or the other, you can either make it look good, or just disallow it. (see how to make it look good and how to disallow particular orientations)
- Splash screen: With Universal apps, every app needs a splash screen - and don't use the default one Visual Studio gives you! (see how to specify an image and background color)
Nice-to-haves- Trial version - if your app is paid, allowing users to try your app will result in many more downloads! (see how to limit functionality during a trial)
- Win: keyboard accessibility - make sure the TabIndex on your controls are set in a reasonable order, and consider adding keyboard shortcuts for common actions (see how to implement keyboard accessibility)
- WP/Win: high-contrast theme - set your phone/device to a high-contrast theme and make sure it looks reasonable and is easy to read. (see more about high-contrast themes)
- Win: accessibility in the Store - if you did the previous two items, you might as well go all the way, make your app fully accessible, and declare it as such in the Store. (see how to declare your app is accessible)
- WP: Kid's Corner - if you're expecting children to use your app, you can detect if it's being run from Kid's Corner and disable in-app purchases, etc. (see how to detect if your app is being run from Kid's Corner)
- Localization - there are a lot of Windows and Windows Phone users in countries where English is not the primary language, so supporting other languages can greatly expand the reach of your app! (see how to prepare your app for localization)
- Share contract - allowing your app to share data makes it more usable. (see how to share content - note that while Windows 8 has the Charms bar so the user can share at any time, Windows Phone does not, so you'll have to provide a UI for sharing)
Good for your app
These are not "taxes" per se, but they're definitely things you should think about before releasing your app!- About page - make it easy for people to contact you with problems/suggestions! (my universal app template provides an About page)
- Rating reminder - more ratings help your app be more visible in the Store. (I recommend the AppPromo package in NuGet, which supports universal apps)
- Link to your other apps - if people like your app, make it easy to find your other apps they might like! (my universal app template provides an easy way to link to your other apps in the Store)
- ads/monetization - just a reminder to think about how you plan on monetizing the app.
Hopefully this will help you not forget anything when you're almost ready to publish your next app! And if I forgot anything, let me know at @gregstoll or greg@gregstoll.com and I'll update this list.
--
See all my Windows Phone development posts.
I'm planning on writing more posts about Windows Phone development - what would you like to hear about? Reply here, on twitter at @gregstoll, or by email at greg@gregstoll.com.
0 comments
Windows Phone: Universal app template with about page, settings, first-run tutorial
Posted on 2014-07-27 19:20:00
Tags: windowsphone wpdev
Words: 314
It's tough to start with a blank app - I always want an About page and some other things. Since Universal apps are all the rage for Windows and Windows Phone, I made a universal app template to help get you started!
This template provides:
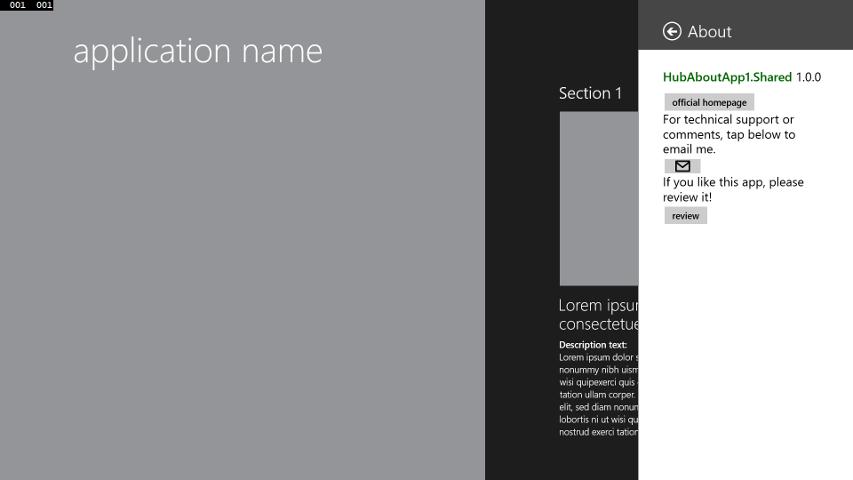
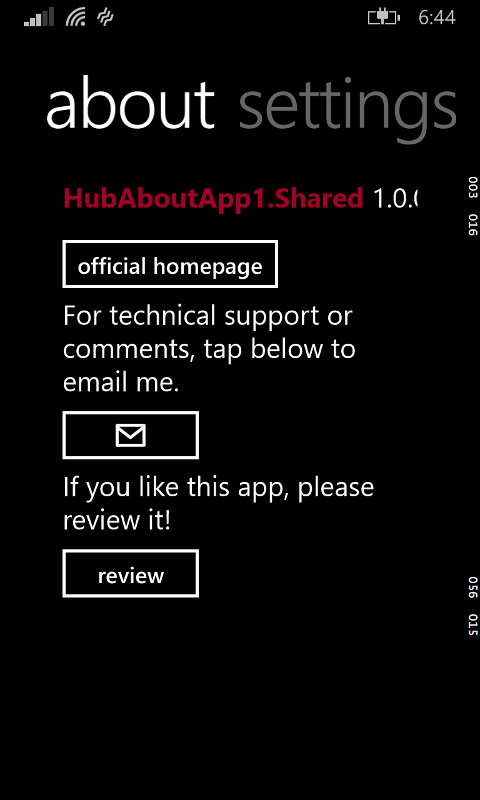
- About pages that are shared between Windows and Windows Phone, including links to other apps, to contact the author, to review the app, etc.
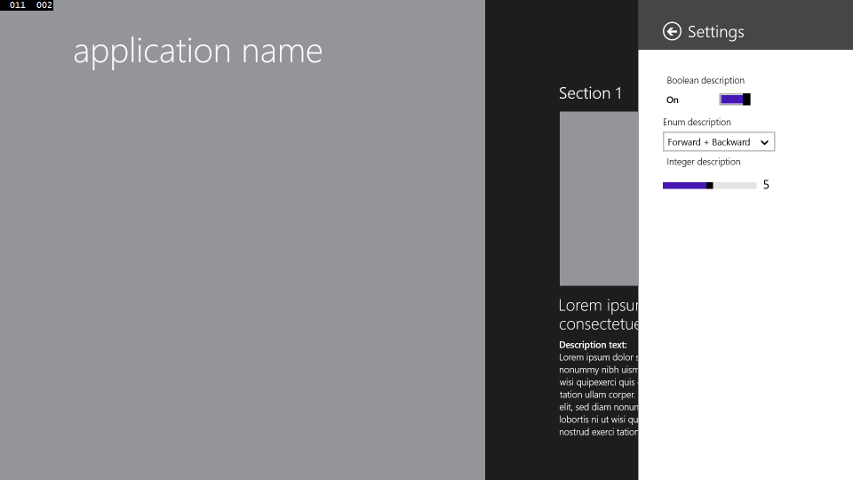
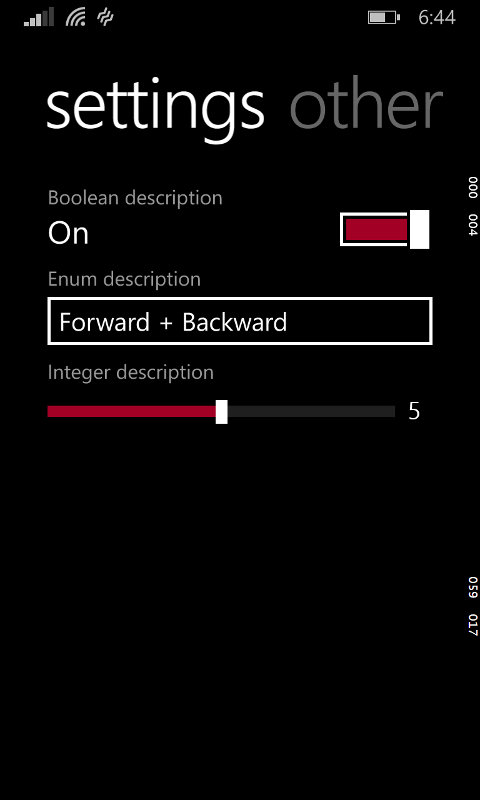
- Settings that are persisted and the user can set (in an about page)
- A first-run tutorial
Downloads:
- WinUniversalTemplate.zip - universal app template
Instructions:
Create the directory <My Documents>\Visual Studio 2013\Templates\ProjectTemplates\Visual C# and download the template to that directory. Next time you start Visual Studio 2013, you should have a "Hub About App (Universal Apps)" entry under Templates/Visual C#.
Notes:
- The template is based on the Universal Hub template - right now that seemed like the best choice since the Universal empty template doesn't have support for navigation, etc.
- I constructed the various About pages so they could be shared between Windows and Windows Phone. That was a bit more awkward than I had expected - if it becomes a burden for you, feel free to split them up. (if you have any questions, feel free to contact me!)
- There are instructions in the README.txt file on how to customize or disable the first-run tutorial.
Screenshots:
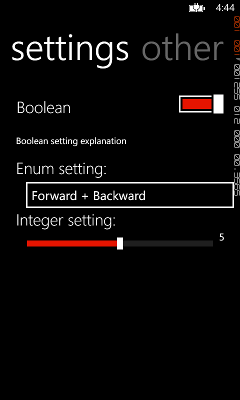
- UserSettings class and settings page
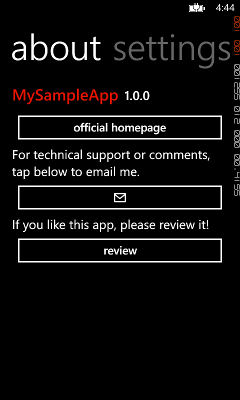
- About page with contact info and review button
- Page for linking to other apps


- First-run tutorial


Problems? Feedback? More things you'd like to see in the template? Let me know at @gregstoll or ext-greg.stoll@microsoft.com!
--
See all my Windows Phone development posts.
I'm planning on writing more posts about Windows Phone development - what would you like to hear about? Reply here, on twitter at @gregstoll, or by email at ext-greg.stoll@microsoft.com.
--
Interested in developing for Windows Phone? I'm the Windows Phone Developer Ambassador for Austin - drop me a line at ext-greg.stoll@microsoft.com!
0 comments
June developer registration drive - win a Lumia phone!
Posted on 2014-05-25 22:42:00
Tags: nokia windowsphone wpdev
Words: 292
It's been a while, so let's do this again! I'm expecting a lot of entries because of the recent DVLUP Day, so this time we'll do two prizes: a white Lumia 520 or cyan Lumia 521 (your choice), and a Lumia 800. Here are the rules:
1. You MUST live in my region - Texas, Louisiana, Arkansas, Mississippi, Tennessee, Missouri, Iowa, Oklahoma, Kansas, Colorado, Nebraska, Wyoming, or South Dakota.
2. You MUST be an existing Windows Phone Developer WITH at least one published app currently in the marketplace.
3. You MUST be an active Windows Phone developer as of June 30th 2014, which means you must have either published a new Windows Phone application or have published an update to an existing Windows Phone application that required xap certification within a 180 day period. (counting back from June 30th your last updated date must be January 1 2014 or later)
Below is an example of where to find the last updated date on your Windows Phone application page in the Windows Phone Store.

Now that you know if you can participate or not here's what you need to do. Email me the REQUIRED information below.
1. First and Last Name
2. Email address (this is the one we can reach you at, one you actually check daily)
3. The link to your qualifying application in the Windows Phone Store.
4. DVLUP.com username (If you haven't registered yet, go do it, it's free and you'll be glad you did)
5. Your Windows Dev Center Publisher GUID (it's on your dev center dashboard)
6. Your location: City, State
Entries must be received by June 30th - the drawing will be done on July 1st.
To enter, email ext-greg.stoll@microsoft.com with the subject "June Registration Drive". Good luck!
0 comments
Windows Phone: info about Windows Phone 8.1 and //build/ sessions
Mood: content
Posted on 2014-04-08 20:58:00
Tags: windowsphone wpdev
Words: 2065
For Windows Phone developers, Microsoft's //build/ conference was a very exciting place! Here's some information for you about developer-specific stuff (Cortana, etc. you can read about plenty of other places...which is not to say Cortana doesn't have some cool stuff for developers!)
The first link to read is What's next for Windows Phone 8 developers. All of the apps for Windows Phone 8 are written against the Silverlight API, and while this is still supported in Windows Phone 8.1, the new APIs that are common with existing Windows 8 apps are called a "Windows Phone Store" or "XAML". (neither one of which is terribly helpful...but I digress) If you want to keep your app as a Silverlight app, here are Supported features for Windows Phone Silverlight 8.1 apps. If you're looking to port your app to the new APIs, check out Migrating your Windows Phone 8 app to a Windows Runtime XAML app, and there's also a very helpful post about Windows Phone 8.1 for Developers–What Controls Are New.
Don't forget: if you want to get the Windows Phone 8.1 update early (and who doesn't?), check out the Windows Phone Preview for Developers - I believe the update will be ready in a week or so.
My notes for the //build/ sessions I went to are below. I'd particularly recommend the "Live Tiles Enhancements", "Nokia APIs", and "Animations in Phone XAML Apps" sessions. My fellow ambassador Lance McCarthy collated videos of all the Windows Phone-related //build/ sessions.
Big news was Windows Phone 8.1 (Action Center for notifications, Cortana, universal apps which shows further unification between Windows 8 and Windows Phone APIs)
Windows free on all <9" devices - seems to change MS's business model, at least on phones
Open-sourced "Roslyn" C# compiler! Not ready for production code yet, but available on github
.NET Foundation ( http://www.dotnetfoundation.org/ ) - has open source .NET stuff, including MEF
new JIT compiler RyuJIT - http://aka.ms/RyuJITinfo (good for startup time and general performance), now has SIMD support
.NET Native ( http://aka.ms/dotnetnative ) - compiles C# all the way to native code (uses C++ optimizer). Still can use all CLR features (garbage collection, etc.) Only for Windows Store apps now. (compiles in the cloud?)
Microsoft logo is colors of Office Red, Xbox Green, Windows Blue, Bing Orange!
Wed Day 1 Keynote
New WP 8.1 (Action Center, Cortana)
Universal apps through "shared" project (not PCL, so you can #if, etc.)
Improved mouse/keyboard support in Win81
- Start menu coming back later this year! But with tiles and stuff
Someday can target XBox with Windows APIs
Nokia phones (630/635 and 930) with SensorCore
Windows free on all <9" devices!
Kinect v2 for Windows
preview of Office Metro for Windows
Wed 4/2 4PM 2-582 Tips and Tricks in Visual Studio 2013 Cathy Sullivan
http://channel9.msdn.com/Events/Build/2014/2-582
http://aka.ms/VSTipsandTricks
http://msdn.microsoft.com/en-us/library/vstudio/dn320181%28v=vs.120%29.aspx
settings sync (to MS account)
search in Tools->Options, Soln Explorer, Error List
Ctrl + double-click window to redock
Ctrl+F4 to close a document
in quick search bar can use filters like @mru (most recently used documents) and @opt (options)
Scrollbar preview thingy - can see changes you've made!
Ctrl+, = Navigate to
Alt+F12 = Code Peek (opens up a temporary window with the definition of what your cursor is on)
- Esc closes
Code Lens - inline view of recent changes, references, etc. (hold Alt to trigger?)
- http://msdn.microsoft.com/en-us/library/dn269218.aspx
Productivity Power Tools - http://visualstudiogallery.msdn.microsoft.com/3a96a4dc-ba9c-4589-92c5-640e07332afd
- can show which files have errors in Solution Explorer
- Bing code search (searches MSDN, Stack Overflow, etc.)
Thu Day 2 Keynote
Lots of Azure - 57% of Fortune 500 use it
Manage Azure machines from inside Visual Studio
Browser Link - live edit page in browser, reflects back to Visual Studio!
Azure Mobile Services stuff
.NET Native - can compile .NET assemblies to real native code!
Roslyn .NET compilers - refactoring preview, now open source! (http://roslyn.codeplex.com), modified lexer to use french quotes for string constants very quickly. Works on Xamarin too
".NET Foundation" - www.dotnetfoundation.org for .NET open source stuff
Thu 1PM 2-588 .NET in a world of devices and services
Best end-to-end dev experience
BYO platform, framework, tools
6M professional .NET developers, 1.8B machines have .NET installed
new JIT compiler RyuJIT - http://aka.ms/RyuJITinfo (good for startup time and general performance), now has SIMD support
Roslyn - add language stuff, good for VS extensibility, diagnostics for style guidelines (i.e. if statements w/o braces), easy to see preview and fix it.
http://referencesource.microsoft.com - source for .NET stuff
.NET Foundation ( http://www.dotnetfoundation.org/ ) - has open source .NET stuff, including MEF
.NET Native ( http://aka.ms/dotnetnative ) - compiles C# all the way to native code (uses C++ optimizer). Only for Windows Store apps now. (compiles in the cloud?)
Efforts have been towards: Native, Open, Cross-Platform
Thu 2:30PM 2-523 Live Tiles Enhancements
Tiles are good unobtrusive notifications
http://bit.ly/TileTemplateCatalog
same templates on Win8 and WP now, although WP might not show every field (no Square310x310 for WP)
Windows Notifications Service - now used on WP as well for client and server. SSL for free.
Types of tile update schedules: Local, Scheduled, Periodic (like on Windows - every 30 mins polls a URL for tile XML data), Push (can do a Raw one which will cause your app to run in the background)
Can do test push notifications through emulator
App.OnNewTilePinned event (to set up polling)
WP Tile notification queue - can cycle through 5 notifications which can have different templates, also support for expiring notifications
Same XML for Win/WP - can use Versions & Fallbacks to support Win8 (instead of 8.1).
Advice: put WP templates first
Session 2-521 - Notifications Deep Dive
Draw tiles - WritableBitmap old, XamlRenderingBackgroundTask is new. Recommend doing in C++ to avoid hitting memory cap.
"Debug Location" toolbar in VS can let you fire Lifecycle Events
App Tile Updater sample
Session 2-517 - what's new
Tips for tile scaling (see presentation)
Live tiles for websites using meta tags
@MattHidinger
Thu 4PM 3-545 Quality and Performance for XAML apps
Reduced memory usage for XAML in WP8.1
TestListViewer class can extend from ListViewer and log when items get prepared/released (PrepareContainerForItemOverride()) to ensure virtualization is working corectly.
Putting ListViewer in a StackPanel can defeat virtualization! (because StackPanel gives infinite space)
- using a Grid instead will fix
Performance Monitor in VS to log CPU, memory usage, etc.
- can take "snapshots" to see objects in memory, do a diff, see why things in memory
double.Parse can break in german ("34.56" -> 3456) - code analysis rule will catch (pass in InvariantCulture)
Multilingual Editor for localization - can auto translate strings via Bing!
Pseudo-localization - puts in crazy characters, can find non-localized strings
Test on screen sizes, no network, themes, optional HW (no front-facing camera)
Automated tests (unit, UI)
- for UI test do New Project->Coded UI Test Project, can navigate, assert that images exist, etc.
Thu 5:30PM 2-549 Nokia APIs
Imaging, Context, Location Music
Imaging SDK v1.2 - easy GIF creation, local image blend, Image Aligner
ChromaKey - pick color to make transparent, combine images (green screen)
blend filter
http://developer.nokia.com/resources/library/Lumia
Can select areas that are background vs. foreground
SensorCore - sense if walking, running, driving, or idle
SC requires HW (only on 630/5, 930 for now...may come to others later??)
Can go back 10 days to get data
Step Counter, Activity Monitor, Place Monitor, Route Tracker
Fri 9AM 4-587 Native code performance on modern CPUs
Cool new instruction in AVX2 - Fused multiply accumulate (FMA)
AVX instructions=some floating point 256-bit SIMD instructions
AVX2 instructions=more 256-bit SIMD instructions
compiling w/ AVX2 instructions available in VS 2013 Update 2
Profile always - can use VS Performance Analyzer, Intel VTune Amplifier, AMD CodeXL
Case study: on Haswell FP multiply=5 cycles, FP add=3 cycles, Fused multiply accumulate(FMA) does both in 5 cycles
For A*B+C, FMA is faster, as expected
For A*B+C*D:
non-FMA code looks like
mul A,B->A
mul C,D->C
add A,C->A
but two multiplies can run in parallel (since multiple ALUs) and the whole thing takes 5+3=8 cycles
FMA code looks like
mul A,B->A
fma A,C,D->A
and takes 5+5=10 cycles!
For things like dot product, FMA is way faster. Haswell has 2 FMA units
cycle timings are different on AMD chips! performance is hard
--
Sidenote: "xmm" registers are 128-bit, "ymm" registers are 256-bit
SSE2 and AVX allow 128-bit autovectorization
AVX2 allows 256-bit autovectorization
You might think 256-bit instructions would make your code 2x faster than using 128-bit instructions, but that ignores memory latency. Optimizing your code by using vector instructions moves your code from CPU-bound to memory-bound. You can see this in Intel's VTune.
Case study: Eigen3 benchmark with AVX2 was 60% than with SSE2! AVX was also slower, and this only showed up on Haswell, not Sandy Bridge.
key difference was turning two 128-bit vector copies into a 256-bit vector copy
Intel VTune showed "Loads blocked by Store Forwarding" was high
Store buffers are a small table of address and data that has been stored to them (42 of them on Haswell) - lets you avoid hitting the real cache if you later to a load on an address in a store buffer.
But loads that overlap multiple store buffers don't get optimized and have to go to cache
An earlier 128-bit store was causing that to be in a store buffer, and then the 256-bit copy couldn't read from it so it had to go to cache!
(this perf bug is in VS 2013 Update 2, fix coming)
512-bit vector instructions are coming
Fri 10:30AM 2-529 Sensor Platform Enhancements in Windows Phone
accelerometer, compass, gyrometer, inclinometer, light sensor, orientation, simple orientation
Can respond to light sensor to add contrast in especially dim/bright settings
Outdoors=5K-50K lux
Indoors Bright=500-1K lux
Indoors Dim=10-100 lux
Dark Room=0-10
If you do respond to these, do gradual changes and use hysteresis to avoid weird toggling effects
Orientation sensor - if it's facedown, maybe ignore gestures?
Lock screen apps can now access sensors. Background apps can also access sensors by registering for a DeviceUseTrigger, although a limited number of apps can do this at once. Also needs special declaration in Appxmanifest.
Can control sensors in WP/Win emulator
remember that background task runs in a separate process
For orientation, display=how pictures on screen are shown, device=physical positioning
Be careful about power usage: can adjust reporting interval in background tasks, make sure you dispose unneeded sensor refs!
if the foreground app crashes your background task can linger
For magnetometer can get whether it's high or low accuracy (based on HW quality, etc.)
Snapdragon sensor core has a low-power core to get sensor data
In WP 8.1 sensor drivers are in user-mode, not kernel-mode
Fri 2PM 3-554 Animations in Phone XAML Apps
Timing is crucial - don't make animations too slow
Can be annoying - careful about repeating them!
Animations are great as subtle feedback (like tilt effect when tapping an item)
*ThemeTransition and *ThemeAnimation are the classes involved
some transitions/animations are on WP only, some are on Win and WP but look different, some are on both and look the same
transitions are when page is entered/exited or when items are moved in a ListBox, etc. and are triggered automatically. Animations are on particular elements, and are triggered manually.
animations extend from Timeline class
transitions are specified in XAML with something like <uielement.Transitions><TransitionCollection><ReorderThemeTransition/></TransitionCollection></uielement.Transitions>
animations are put in a Storyboard
PageNavigationThemeTransition's - when navigating from page A -> page B, uses transitions in page B (when going forward or back)
attached property DefaultNavigationTransitionInfo
other transitions: Common (the default one), Slide, Continuum
Even with Common, can get a staggering effect in a ListView - in the transition set IsStaggeringEnabled="True", in the control set attached property IsStaggerElement="True"
Slide - quick animation for leaf node pages (like facebook comments page)
Continuum - text of selected element flies out/in. Good for master->details page (like tapping on an email in email app)
Specify elements with ContinuumNavigationThemeTransition.IsEntranceElement on page B, CNTT.IsExitElement on page A. (for performance, also need CNTT.ExitElementContainer on the container in page A)
New parameter to Navigate() method - can override animation by passing NavigationTransitionInfo.
PopUpThemeTransition - built into Flyouts, Jump lists
PointerUpDownThemeTransition (i.e. "tilt effect") - built into button, ListViewItem, etc.
Uses VisualStates and VisualStateManager like on Win. Can go to a particular state (i.e. "Pressed" or "None") in code with VisualStateManager.GoToState()
SlideInThemeTransition for Pivot swiping. Can set attached property Pivot.SlideInAnimationGroup on contents (up to 3 levels of staggering)
A few builtin animations - "Accordion" (compression) for scrollable elements when reach the top/bottom, page rotation animation with crossfade, menu flyout show and hide
--
See all my Windows Phone development posts.
I'm planning on writing more posts about Windows Phone development - what would you like to hear about? Reply here, on twitter at @gregstoll, or by email at ext-greg.stoll@nokia.com.
--
Interested in developing for Windows Phone? I'm the Nokia Developer Ambassador for Austin - drop me a line at ext-greg.stoll@nokia.com!
0 comments
Windows Phone: adding a first run tutorial to your app
Mood: happy
Posted on 2014-02-05 21:33:00
Tags: windowsphone projects wpdev
Words: 512
In the Austin area? Come to the Austin Code-a-thon and have a chance to win a JBL Wireless Charging Speaker!
--
My Marriage Map app has gotten some bad reviews complaining about missing features that were actually present in the app. So, I decided to make a quick tutorial that would point out how to use the app the first time the user ran it. I did a quick search for some sample code but couldn't find any, so I rolled my own. (download the latest version of the app to try it out!) It features
- graying out and disabling of controls under it
- detecting first launch
- ability to launch the tutorial again (from the About page in my case)
- back button goes back
- nice fading in and out of tutorial steps
- ability to highlight buttons, etc. in different steps
- suspend/tombstone support
- looks correct in dark or light theme
- if taps are too close together, will ignore the second one
None of these were particularly difficult, but adding them all took a bit of work. So I made a sample project with the same system to make it easier to add to your apps.
FirstRunTutorial.wp.zip
Some notes on the code:
- Search for TODO to find places you need to make changes.
- The
_firstRunActive and _firstRunIndex keep track of whether we're showing the tutorial and what step it's on.
- Most of the work happens in
UpdateFirstRunCanvas() - this is where you have to add new steps. Don't forget to update MAX_FIRSTRUNINDEX when you do!
- The fading is done by a bunch of Storyboard objects in MainPage.xaml. (see the Animation Overview for Windows Phone for more info) Unfortunately, the best way I could find to make things fade was to set their opacity to 0.0, make them visible, and then run the Storyboard to transition the opacity to 1.0 (or whatever you want). This means you have to make two different calls to make this work. On fading out, you have to do the opposite - transition the opacity to 0.0 and then make it collapsed, but the
HideWhenDone() method that gets run when the Storyboard is done takes care of making it collapsed.
- Making the button blink is also handled by a Storyboard - you can try different EasingFunctions to make it blink differently!
- Disabling controls under the tutorial is handled in
SetFirstRunActive(). I was hoping that just putting the FirstRunCanvas with a high z-index would make it be on top of everything and intercept their clicks, but for some reason that didn't work.
- The code to start the tutorial again is in the About.xaml page - you just have to navigate to
/MainPage.xaml?RemoveBackAll=1&Tutorial=1, and OnNavigatedTo() in MainPage.xaml starts the tutorial. If you want to start it from the MainPage.xaml code, just do SetFirstRunActive(true);_firstRunIndex=0;UpdateFirstRunCanvas();
--
See all my Windows Phone development posts.
I'm planning on writing more posts about Windows Phone development - what would you like to hear about? Reply here, on twitter at @gregstoll, or by email at ext-greg.stoll@nokia.com.
--
Interested in developing for Windows Phone? I'm the Nokia Developer Ambassador for Austin - drop me a line at ext-greg.stoll@nokia.com!
0 comments
Windows Phone: performance of parsing different file types
Mood: chipper
Posted on 2014-01-09 22:26:00
Tags: windowsphone projects wpdev
Words: 1033
When I started to work on Baseball Odds I knew I was going to have to worry about performance - the data set I have for the win probability has right around 15000 records. So I thought it would be neat to compare different file formats and how long it took to read their data in. Each record had the inning number (with top or bottom), how many outs, what runners are on base, the score difference, and the number of situations and the number of times the current team won. Here's a brief description of each format and some sample code:
Text:
This was actually the format I already had the data in, as it matched Phil Birnbaum's data file format. A sample line looks like this:
"H",1,0,1,0,81186,47975
and there are 15000 lines in the file. The code to parse this looks something like this:
const bool USE_AWAIT = false;

const bool CONFIGURE_AWAIT = false;

var resource = System.Windows.Application.GetResourceStream(

    new Uri(@"Data\winProbs.txt", UriKind.Relative));

using (StreamReader sr = new StreamReader(resource.Stream))

{

    string line;

    if (USE_AWAIT)

    {

        if (CONFIGURE_AWAIT)

        {

            line = await sr.ReadLineAsync().ConfigureAwait(false);

        }

        else

        {

            line = await sr.ReadLineAsync();

        }

    }

    else

    {

        line = sr.ReadLine();

    }

    while (line != null)

    {

        var parts = line.Split(',');

        bool isHome = (parts[0] == "\"H\"");

        _fullData.Add(new Tuple<bool, byte, byte, byte, sbyte>(

            isHome, byte.Parse(parts[1]), byte.Parse(parts[2]), byte.Parse(parts[3]),

            sByte.Parse(parts[4])),

            new Tuple<UInt32, UInt32>(UInt32.Parse(parts[5]), UInt32.Parse(parts[6])));


        if (USE_AWAIT)

        {

            if (CONFIGURE_AWAIT)

            {

                line = await sr.ReadLineAsync().ConfigureAwait(false);

            }

            else

            {

                line = await sr.ReadLineAsync();

            }

        }

        else

        {

            line = sr.ReadLine();

        }

     }

}
(what are USE_AWAIT and CONFIGURE_AWAIT all about? See the results below...)
JSON:
To avoid having to write my own parsing code, I decided to write the data in a JSON format and use Json.NET to parse it. One line of the data file looks like this:
{isHome:1,inning:1,outs:0,baserunners:1,runDiff:0,numSituations:81186,numWins:47975}
This is admittedly a bit verbose, and it makes the file over a megabyte. The parsing code is simple, though:
var resource = System.Windows.Application.GetResourceStream(

    new Uri(@"Data\winProbs.json", UriKind.Relative));

using (StreamReader sr = new StreamReader(resource.Stream))

{

    string allDataString = await sr.ReadToEndAsync();

    JArray allDataArray = JArray.Parse(allDataString);

    for (int i = 0; I < allDataArray.Count; ++i)

    {

        JObject dataObj = (JObject)(allDataArray[i]);

        _fullData.Add(new Tuple<bool, byte, byte, byte, sbyte>(

            (int)dataObj["isHome"] == 1, (byte)dataObj["inning"],

            (byte)dataObj["outs"], (byte)dataObj["baserunners"], (sbyte)dataObj["runDiff"]),

            new Tuple<UInt32, UInt32>((UInt32)dataObj["numSituations"],

                                      (UInt32)dataObj["numWins"]));

    }

}
After I posted this, Martin Suchan pointed out that using JsonConvert might be faster, and even wrote some code to try it out.
Binary:
To try to get the file to be as small as possible (which I suspected correlated with parsing time), I converted the file to a custom binary format. Here's my textual description of the format:
UInt32 = total num records

UInt32 = num of records that have UInt32 for num situations

         (these come first)

each record is:

   UInt8 = high bit = visitor=0, home=1

           rest is inning (1-26)

   UInt8 = high 2 bits = num outs (0-2)

           rest is baserunners (1-8)

   Int8 = score diff (-26 to 27)

   UInt32/UInt16 = num situations

   UInt16 = num of wins
To format the file this way, I had to write a Windows 8 app that read in the text file and wrote out the binary version using a BinaryWriter with the Write(Byte), etc. methods. Here's the parsing code:
var resource = System.Windows.Application.GetResourceStream(

    new Uri([@"Data\winProbs.bin", UriKind.Relative));

using (var br = new System.IO.BinaryReader(resource.Stream))

{

    UInt32 totalRecords = br.ReadUInt32();

    UInt32 recordsWithUInt32 = br.ReadUInt32();

    for (UInt32 i = 0; i < totalRecords; ++i)

    {

        byte inning = br.ReadByte();

        byte outsRunners = br.ReadByte();

        sbyte scoreDiff = br.ReadSByte();

        UInt32 numSituations = (i < recordsWithUInt32) ? br.ReadUInt32() : br.ReadUInt16();

        UInt16 numWins = br.ReadUInt16();

        _compressedData.Add(new Tuple<byte, byte, sbyte>(inning, outsRunners, scoreDiff),

            new Tuple<uint, ushort>(numSituations, numWins));

    }

}
Results:
Without further ado, here are the file sizes and how long the files took to read and parse (running on my Lumia 1020):
| Type | File size | Time to parse |
|---|
Text (USE_AWAIT=true)
(CONFIGURE_AWAIT=false) | 278K | 4.8 secs |
Text (USE_AWAIT=true)
(CONFIGURE_AWAIT=true) | 278K | 0.4 secs |
Text (USE_AWAIT=false) | 278K | 0.4 secs |
| JSON (parsing one at a time) | 1200KB | 3.2 secs |
JSON (using JsonConvert) | 1200KB | 1.3 secs |
| Binary | 103KB | 0.15 secs |
A few observations:
- Apparently there is some overhead involved in
awaiting 15000 calls, as this increased the time to parse the text file from 0.4 secs to 4.8 secs! Not hugely surprising, but something to keep in mind - if a call is going to be very short and you're going to be doing it many times, try not awaiting it. If you want to use await, you can call ConfigureAwait(false) to not force the continuation back into its original context - this seems to almost entirely eliminate the overhead. For more information, I'd recommend the article Best Practices in Asynchronous Programming.
- JSON is very convenient, but its parsing time was by far the longest. I'll keep this in mind for my other apps - it might be worth investing in a different format even if parsing it is more of a hassle. However, using
JsonConvert cut down on the time significantly. I had always avoided doing that because of the pain of declaring a class, but I'll definitely do it in the future!
- Parsing a simple text file can be quite fast (keeping the above
await caveat in mind)
- Binary was the clear winner here in file size and parsing time. However, the code to write the file (not shown here) took much more work than either of the other two formats, including my time to analyze the range of values of each entry and figuring out how tightly I could pack it. And if I need to update this data and suddenly the range of an entry expands so it doesn't fit in a byte any more (for example), it's a huge hassle to rewrite both the writing and the parsing code. Binary formats are not a free lunch!
So since I had already done all the work I went with the binary format, and Baseball Odds starts up lickety-split!
--
See all my Windows Phone development posts.
I'm planning on writing more posts about Windows Phone development - what would you like to hear about? Reply here, on twitter at @gregstoll, or by email at ext-greg.stoll@nokia.com.
--
Interested in developing for Windows Phone? I'm the Nokia Developer Ambassador for Austin - drop me a line at ext-greg.stoll@nokia.com!
0 comments
Windows Phone: tips for lock screen functionality
Mood: busy
Posted on 2013-12-03 22:35:00
Tags: windowsphone wpdev
Words: 352
Motivational Penguin was my first app that had any lock screen functionality, so I thought I'd write up a few tips I learned along the way.
- The official lock screen documentation is quite good - see also the lock screen design guidelines. Although I didn't strictly obey the "Keep any text or graphics within this area" boxes - it seems like there's nothing wrong with spreading out to the right of the box?
- Motivational Penguin updates the lock screen in the background (which is common), and I ran into some trouble with the background agent. This is why I wrote a post about debugging scheduled tasks recently - there are some helpful tips in there!
- You will need some way to let the user decide whether to have the app update your lock screen or not (my app does this via a ToggleSwitch, part of the Windows Phone Toolkit). Be careful that if the user does let your app update your lock screen that you also check the value of Windows.Phone.System.UserProfile.LockScreenManager.IsProvidedByCurrentApplication - if this is false then your app won't have permission to update the lock screen. In my app I check this every time I show the ToggleSwitch and if it is false, make sure the ToggleSwitch is false as well.
- A nice feature to add is to configure how often to update the lock screen. I took my list of choices from Memorylage, my favorite lock screen updater. (seriously, check it out, it's great and well worth it!) Memorylage allows updates Hourly, TwiceDaily, Daily, and EveryOtherDay. To implement this, you can store the last time you updated the lock screen in System.IO.IsolatedStorage.IsolatedStorageSettings.ApplicationSettings, and if enough time hasn't passed, just exit early.
I hope these are helpful! Being able to update the lock screen in the background is really pretty cool :-)
--
See all my Windows Phone development posts.
I'm planning on writing more posts about Windows Phone development - what would you like to hear about? Reply here, on twitter at @gregstoll, or by email at ext-greg.stoll@nokia.com.
--
Interested in developing for Windows Phone? I'm the Nokia Developer Ambassador for Austin - drop me a line at ext-greg.stoll@nokia.com!
0 comments
Windows Phone: debugging scheduled tasks
Mood: happy
Posted on 2013-11-19 22:32:00
Tags: windowsphone wpdev
Words: 113
I'm running into trouble with a scheduled task in an app I'm working on. I was going to write a post about how to debug a scheduled task, and then I realized I had already written one! Here's info on how to effectively debug a scheduled task. In my case, the ScheduledTaskLogger is going to come in very handy!
--
See all my Windows Phone development posts.
I'm planning on writing more posts about Windows Phone development - what would you like to hear about? Reply here, on twitter at @gregstoll, or by email at ext-greg.stoll@nokia.com.
--
Interested in developing for Windows Phone? I'm the Nokia Developer Ambassador for Austin - drop me a line at ext-greg.stoll@nokia.com!
0 comments
November developer registration drive
Posted on 2013-11-12 22:55:00
Tags: nokia windowsphone wpdev
Words: 284
Would you like to win a pair of Monster Purity in-ear headphones in cyan, fuschia, or black? (your choice) Sure you would! The rules are simple:
1. You MUST live in my region - southern Texas (including San Antonio, Austin and Houston - if you're not sure, ask!), Louisiana, Arkansas, Mississippi, Tennessee, Missouri, or Iowa.
2. You MUST be an existing Windows Phone Developer WITH at least one published app currently in the marketplace.
3. You MUST be an active Windows Phone developer as of November 30th 2013, which means you must have either published a new Windows Phone application or have published an update to an existing Windows Phone application that required xap certification within a 180 day period. (counting back from November 30th your last updated date must be June 3rd 2013 or later)
Below is an example of where to find the last updated date on your Windows Phone application page in the Windows Phone Store.
Now that you know if you can participate or not here's what you need to do. Email me the REQUIRED information below.
1. First and Last Name
2. Email address (this is the one we can reach you at, one you actually check daily)
3. The link to your qualifying application in the Windows Phone Store.
4. DVLUP.com username (If you haven't registered yet, go do it, it's free and you'll be glad you did)
5. Your Windows Dev Center Publisher GUID (it's on your dev center dashboard)
6. Your location: City, State/Province (and county if you are in TX)
Entries must be received by November 30th - the drawing will be done on December 1st.
To enter, email ext-greg.stoll@nokia.com with the subject "November Registration Drive". Good luck!
0 comments
Windows Phone: including ads in your app, and using In-App Purchasing to turn them off
Mood: cheerful
Posted on 2013-09-04 19:55:00
Tags: windowsphone wpdev
Words: 824
Free apps are wildly more popular than paid apps, but some people (myself included) get annoyed at ads in apps. To get the best of both worlds, you can include ads in your free app but let people in-app purchase a way to turn them off. I've done this in two apps now (HospitalPrices, and SatRadioGuide), and here's how to do it!
Note that this is for Windows Phone 8.0 - here's a similar guide for Win/WP 8.1 Universal apps.
Part 1: Adding advertising
I'm going to use the Nokia Ad Exchange, although there are other choices such as Microsoft pubCenter, Ad Exchange, etc. You can also use the Ad Rotator to switch these on the fly and rotate between them.
This will be a fairly brief guide - see this guide on the Nokia Developer Wiki for a more thorough one. Honestly, if I had found that one first I would have just linked to that and skipped to Part 2, but it seems a shame to waste all these words!
1. Sign up for an account at nax.nokia.com. Under the SDKs tab, download the SDK for the versions of Windows Phone you'd like to target. Unzip the SDK - you'll find some documentation as well as Inneractive.Ad.dll. Under the Add App tab, create a new AppID (it's OK to leave the description and download link blank for now).
2. In your Windows Phone project, right-click on References, and click Add Reference. Go to the Browse section, and browse to the Inneractive.Ad.dll you unzipped from the SDK. Make sure the following permissions are set in your WMAppManifest.xml:
- ID_CAP_NETWORKING
- ID_CAP_WEBBROWSERCOMPONENT
- ID_CAP_PHONEDIALER
- ID_CAP_IDENTITY_DEVICE
If you want location-based ads, see the documentation.
3. Wherever you'd like to put an ad in the app, use the following XAML:
<ad:InneractiveAd

 xmlns:ad="clr-namespace:Inneractive.Nokia.Ad;assembly=Inneractive.Ad"

 AppID="<your ad ID>" AdType="IaAdType_Banner"

 ReloadTime="60" Name="Ad" />
See the documentation if you'd like to customize this further.
--
Now the ads in your app should be working! Launch it and make sure that they appear and don't obscure any content.
Part 2: Using In-App Purchasing to Disable Ads
Note that in-app purchasing is only possible in Windows Phone 8 apps. For Windows Phone 7 apps, you can use a similar technique and only show ads in the trial version of an app.
1. Log in to the Windows Phone Dev Center, click "Dashboard" (at the top), then "Submit App" on the left. Under the "App info" section, give your app a name and category, then Save. (you can change these when you're ready to submit for real) Go back to the dashboard, select your new app, and go to the "Products" section. Click "Add in-app product". For the product info, specify whatever you want for the product alias (I usually use "<your app name>-NoAds") and "NoAds" for the product identifier. Set the type to "Durable", select the price, and click Save. Then specify a title and description - for the icon, feel free to use this:
(click for full-sized image)
Finally, submit the product. Since your app isn't published yet, it won't be visible to anyone else
2. Either create a Utils class or add this code to an existing one:
public static bool ShowAds { get; set; }

public static void UpdateInAppPurchases()

{

    ShowAds = true;

    var allLicenses = Windows.ApplicationModel.Store.

        CurrentApp.LicenseInformation.ProductLicenses;

    if (allLicenses.ContainsKey("NoAds"))

    {

        var license = allLicenses["NoAds"];

        if (license.IsActive)

        {

            ShowAds = false;

        }

    }

}
In App.xaml.cs, add a call to Utils.UpdateInAppPurchases() to the Application_Launching() and Application_Activated() methods.
3. Find all of the ads you added in XAML, and add Visibility="Collapsed" to them. Then, to each page that has an ad, add this method:
public void UpdateAd()

{

    Ad.Visibility = Utils.ShowAds ? Visibility.Visible : Visibility.Collapsed;

}
and add a call to UpdateAd() to the OnNavigatedTo() method.
4. All that's left now is to add the option to remove ads from inside the app. If you'd like to add a menu item in the app bar, you can add the following XAML:
<shell:ApplicationBar.MenuItems>

     <shell:ApplicationBarMenuItem Text="remove ads" Click="RemoveAds_Click"/>

</shell:ApplicationBar.MenuItems>
Or, you can add a button in your about page, or both.
Then, add the event handler:
private async void RemoveAds_Click(object sender, EventArgs e)

{

    try

    {

        await Windows.ApplicationModel.Store.CurrentApp

            .RequestProductPurchaseAsync("NoAds", false);

        UpdateAd();

    }

    catch (Exception)

    {

        // oh well

    }

}
Finally, to remove the menu item from the page if the user has already removed the ads, add this code to your UpdateAd() method:
// if we add more of these, we'll need to be more clever here

if (!Utils.ShowAds && ApplicationBar.MenuItems.Count > 0)

{

    ApplicationBar.MenuItems.RemoveAt(0);

}
--
To test the in-app purchasing code, you'll need to publish your app as a beta. (all in-app purchases are free in a beta) But, other than that, you're done!
References: Windows Phone blog post on In-App Purchasing
In-App Purchase: Success stories and Tips to test common in-app failure scenarios
--
See all my Windows Phone development posts.
I'm planning on writing more posts about Windows Phone development - what would you like to hear about? Reply here, on twitter at @gregstoll, or by email at ext-greg.stoll@nokia.com.
--
Interested in developing for Windows Phone? I'm the Nokia Developer Ambassador for Austin - drop me a line at ext-greg.stoll@nokia.com!
0 comments
Windows Phone: showing images built in to your app
Mood: cheerful
Posted on 2013-07-09 22:14:00
Tags: windowsphone wpdev
Words: 224
This isn't too tricky, but for some reason I always mess it up. If you have images that you ship with your app and want to display them in XAML, here's how to do it.
The images in your app can be set in Visual Studio to Content or Resource. Generally you'll want to use Content (for performance), but I'll cover both.
In XAML:
<Image Source="images/yellow.jpg"/>
This works whether the image is Content or Resource.
In C#:
If the image is Content:
CSharpContentImage.Source =

    new BitmapImage(new Uri("images/cyan.jpg", UriKind.RelativeOrAbsolute));
If the image is Resource:
CSharpResourceImage.Source =

    new BitmapImage(new Uri("/ImageSources;component/images/grey.jpg", UriKind.Relative));
Note that in this case "ImageSources" is the name of the .xap file.
I've put together a small sample WP project with all four of these images.
If you want to display images in a WebBrowser control, it appears that you have to copy the images to IsolatedStorage. There is a hint that there might be a direct way to do this in WP8 but I couldn't find any more documentation on it.
--
See all my Windows Phone development posts.
I'm planning on writing more posts about Windows Phone development - what would you like to hear about? Reply here, on twitter at @gregstoll, or by email at ext-greg.stoll@nokia.com.
--
Interested in developing for Windows Phone? I'm the Nokia Developer Ambassador for Austin - drop me a line at ext-greg.stoll@nokia.com!
0 comments
Windows Phone: HospitalPrices released, how to show 3000+ markers on a Map
Mood: happy
Posted on 2013-06-12 21:38:00
Tags: windowsphone projects wpdev
Words: 500
I just released HospitalPrices for Windows Phone. One of the more interesting parts was figuring out how to put 3000+ markers on a Map control. My first attempt was putting all the markers on the Map, but that ran out of memory. After some more tinkering, here's what I ended up with. It runs pretty smoothly on my Lumia 920 - if it needed to run faster I could have implemented a quad tree to search for markers instead of checking all 3000+ of them every time.
Want to make your own app/website? Check out the SQLite database with all the data!
Prerequisites: I'm using the Windows Phone 8 Map control - MarkerMap is the Map control, and every time the center or zoom level changes we call UpdatePins().
using Microsoft.Phone.Maps.Controls;

using System.Device.Location;


GeoCoordinate _lastUpdatedTopLeft = null;

GeoCoordinate _lastUpdatedBottomRight = null;

MapLayer _pinLayer = new MapLayer();

private void Init()

{

    MarkerMap.Layers.Add(_pinLayer);

}

public bool CoordInBounds(GeoCoordinate coord,

                          GeoCoordinate topLeft,

                          GeoCoordinate bottomRight)

{

    return (coord.Longitude >= topLeft.Longitude &&

            coord.Longitude <= bottomRight.Longitude &&

            coord.Latitude <= topLeft.Latitude &&

            coord.Latitude >= bottomRight.Latitude);

}

private void UpdatePins()

{

    const double ZOOM_LEVEL_THRESHOLD = 9.0;

    if (MarkerMap.ZoomLevel >= ZOOM_LEVEL_THRESHOLD)

    {

        const int MAP_MARKER_MARGIN = 150;

        GeoCoordinate neededTopLeft =

           MarkerMap.ConvertViewportPointToGeoCoordinate(

             new Point(-1 * MAP_MARKER_MARGIN, -1 * MAP_MARKER_MARGIN));

        GeoCoordinate neededBottomRight =

           MarkerMap.ConvertViewportPointToGeoCoordinate(

             new Point(MarkerMap.ActualWidth + MAP_MARKER_MARGIN,

                       MarkerMap.ActualHeight + MAP_MARKER_MARGIN));

        // See if we already have all the necessary markers

    if (_lastUpdatedTopLeft != null &&

        CoordInBounds(neededTopLeft, _lastUpdatedTopLeft, _lastUpdatedBottomRight) &&

        CoordInBounds(neededBottomRight, _lastUpdatedTopLeft, _lastUpdatedBottomRight))

    {

        return;

    }

    var existingIdsList = _pinLayer.Select(

        (overlay) => (int)(((FrameworkElement)overlay.Content).Tag));

    HashSet<int> existingIds = new HashSet<int>();


    foreach (var id in existingIdsList)

    {

        existingIds.Add(id);

    }

    Collection<int> indicesToRemove = new Collection<int>();

    Collection<MapOverlay> overlaysToAdd = new Collection<MapOverlay>();

    // TODO - this is the entire collection of markers. Each has an integer

    // Id and a Latitude and Longitude, as well as a PinBrush which is the

    // color of their marker.

    var datas = GetHospitalBasicData();

    _lastUpdatedTopLeft = MarkerMap.ConvertViewportPointToGeoCoordinate(

        new Point(-2 * MAP_MARKER_MARGIN, -2 * MAP_MARKER_MARGIN));

    _lastUpdatedBottomRight = MarkerMap.ConvertViewportPointToGeoCoordinate(

        new Point(MarkerMap.ActualWidth + 2 * MAP_MARKER_MARGIN,

                  MarkerMap.ActualHeight + 2 * MAP_MARKER_MARGIN));

    // Check existing markers

    for (int i = 0; i < _pinLayer.Count; ++i)

    {

        GeoCoordinate coord = _pinLayer[i].GeoCoordinate;

        if (!CoordInBounds(coord, _lastUpdatedTopLeft, _lastUpdatedBottomRight))

        {

            indicesToRemove.Add(i);

        }

    }

    foreach (var data in datas)

    {

        if (!existingIds.Contains(data.Id))

        {

            GeoCoordinate coord = data.Coordinate;

            if (CoordInBounds(coord, _lastUpdatedTopLeft, _lastUpdatedBottomRight))

            {

                MapOverlay overlay = new MapOverlay();

                Ellipse e = new Ellipse()

                {

                    Fill = data.PinBrush,

                    Height = 35,

                    Width = 35,

                    Stroke = new SolidColorBrush(Colors.Black),

                    StrokeThickness = 3,

                    Tag = data.Id

                };

                overlay.Content = e;

                overlay.GeoCoordinate = coord;

                overlaysToAdd.Add(overlay);

            }

        }

    }

    // Now, switch them out.

    int numToReplace = Math.Min(indicesToRemove.Count, overlaysToAdd.Count);

    for (int i = 0; i < numToReplace; ++i)

    {

        _pinLayer[indicesToRemove[i]] = overlaysToAdd[i];

    }

    if (indicesToRemove.Count > numToReplace)

    {

        int offset = 0;

        // We know that indicesToRemove is sorted

        for (int i = numToReplace; i < indicesToRemove.Count; ++i)

        {

            _pinLayer.RemoveAt(indicesToRemove[i] - offset);

            offset += 1;

        }

    }

    else if (overlaysToAdd.Count > numToReplace)

    {

        for (int i = numToReplace; i < overlaysToAdd.Count; ++i)

        {

            _pinLayer.Add(overlaysToAdd[i]);

        }

    }

    else

    {

        _pinLayer.Clear();

        _lastUpdatedTopLeft = null;

        _lastUpdatedBottomRight = null;

        _lastPinColorType = null;

    }

}
--
See all my Windows Phone development posts.
I'm planning on writing more posts about Windows Phone development - what would you like to hear about? Reply here, on twitter at @gregstoll, or by email at ext-greg.stoll@nokia.com.
--
Interested in developing for Windows Phone? I'm the Nokia Developer Ambassador for Austin - drop me a line at ext-greg.stoll@nokia.com!
0 comments
Hospital price data - now in a handy SQLite database!
Mood: excited
Posted on 2013-05-12 15:27:00
Tags: windowsphone projects wpdev
Words: 73
Well, I got so excited at the hospital prices data released by the government that I wanted to make it easier for people (myself included!) to write apps with it. So: here's the data in an SQLite database which includes geocoding data and some basic calculations.
I would love to see some cool apps based on this data. Let me know (ext-greg.stoll@nokia.com) if you're going to be working on something for Windows Phone!
0 comments
Windows Phone: Visual Studio templates for creating a new app
Mood: cheerful
Posted on 2013-04-14 17:30:00
Tags: windowsphone wpdev
Words: 259
Edit: I've updated this template to make it a Universal app and added a first-run tutorial!
Some of my articles about Windows Phone development have been focused implementing things that every app needs, like settings that are easily set in a UI. A similar article that I haven't gotten around to is writing a proper About page. I figured instead of writing an article I'd make a Visual Studio template with an About page, so when you're creating a new app you can use it and get it easily. So...here you go!
Downloads:
- AppWithAbout71.zip - template for WP 7.1 apps
- AppWithAbout80.zip - template for WP 8.0 apps
Instructions:
Create the directory Documents\Visual Studio 2012\Templates\ProjectTemplates\Visual C#\Windows Phone, and download the templates to that directory. Next time you start Visual Studio and create a new project, you should see two new choices: "Windows Phone App with About page (7.1)" and "Windows Phone App with About page (8.0)". After creating from one of those templates, follow the instructions in README.txt.
Features:
- UserSettings class and settings page:
- About page with contact info and review button:
- Tips page:

- Page for linking to other apps
Problems? Feedback? More things you'd like to see in the template? Let me know at @gregstoll or ext-greg.stoll@nokia.com!
--
See all my Windows Phone development posts.
I'm planning on writing more posts about Windows Phone development - what would you like to hear about? Reply here, on twitter at @gregstoll, or by email at ext-greg.stoll@nokia.com.
--
Interested in developing for Windows Phone? I'm the Nokia Developer Ambassador for Austin - drop me a line at ext-greg.stoll@nokia.com!
0 comments
Storing data on Windows Phone
Mood: excited
Posted on 2013-03-28 22:06:00
Tags: windowsphone wpdev
Words: 925
This post is adapted from a presentation I gave at the University of Texas IEEE Computer Society on March 6, 2013
Storing data on a device is one of those things that is different on every platform, but it's crucial to most apps. (especially if you want to make them work offline) Windows Phone has a lot of good options for storing data - let's look at four of them:
- Resource packaged with the app - an ideal way to ship data with your app
- Isolated Settings - best for lightweight and small data, such as app settings
- Isolated Storage File - best for storing full files
Serializing to/from JSON - a brief aside; useful when packaging a resource with the app or storing data in an Isolated Storage File
- Local database - best for fully structured data that needs to be high performance
Resource packaged with the app
This is a great way to ship static data with an app. For example, in my Marriage Map app, I ship a static version of the marriage data so that if the phone is offline during first launch of the app, we can still show some data. (if the phone is online, it downloads the current data and saves it to Isolated Storage)
Anyway, this is pretty straightforward. Add the file to your project, select the file, and in the Properties window set the Build Action to Content. After this, you can read the file with:
var resource = System.Windows.Application.GetResourceStream(

    new Uri(@"Data\stateData.js", UriKind.Relative));

using (StreamReader sr = new StreamReader(resource.Stream))

{

    string allDataString = sr.ReadToEnd();

}
If you're going to be storing data in this file, I'd recommend using JSON format - see Parsing JSON for details.
Isolated Settings
Isolated Settings are great for storing very small bits of data, like user preferences. If you want to make a settings page and have that data automatically stored in Isolated Settings, see my previous posts on adding settings to your app and adding enum settings to your app.
The class we'll be using is System.IO.IsolatedStorage.IsolatedStorageSettings - it's implements a simple Dictionary<TKey,TValue> interface to read and write. To write data, use
IsolatedStorageSettings.ApplicationSettings["NumQuizzes"] = 3;
and to read it, use
int nQ = (int)IsolatedStorageSettings.ApplicationSettings["NumQuizzes"];
Isolated Settings are backed by an Isolated Storage File, which we'll talk about next!
Isolated Storage File
For more complex data, you can move up to using the full Isolated Storage API to store data in files. There's a full filesystem you have total control over. (which is only accessible to your app, of course!) I use this in FlightPredictor to store the user's flights.
The main class we'll use is System.IO.IsolatedStorage.IsolatedStorageFile. To write to a file, use
using (var store = IsolatedStorageFile.GetUserStoreForApplication())

{

    using (var stream = store.OpenFile("flights.json", System.IO.FileMode.Create))

    {

        using (var streamWriter = new StreamWriter(stream))

        {

            streamWriter.Write("{\"flights\": []}");

        }

    }

}
and to read from it, use
using (var store = IsolatedStorageFile.GetUserStoreForApplication())

{

    using (var stream = store.OpenFile("flights.json", FileMode.Open))

    {

        using (var streamReader = new StreamReader(stream));

        {

            string flightsString = streamReader.ReadToEnd();

        }

    }

}
There are other methods on IsolatedStorageFile like CreateDirectory() and GetFileNames() if you want to really use isolated storage as a filesystem.
Serializing to/from JSON
See this post for comparing parsing time for different file formats, including JSON
Note that these APIs let you read and write text to files. Usually, you'll want to store more structured data, and I'd recommend using the JSON format because Json.NET makes it very easy. Here's how!
First, you can use the DataContract and DataMember attributes on an existing class. For example, here are the first few lines of my Flight class:
[DataContract]

public class Flight : INotifyPropertyChanged, IComparable<Flight>

{

    [DataMember]

    public string AirlineName;

    [DataMember]

    public int Number;

    [DataMember]

    public DateTime DepartureTime;
Then, to turn a list of Flights into a string, use:
List<Flight> flights = new List<Flight>();

flights.Add(flight);

string flightsString = JsonConvert.SerializeObject(flights);
and to read a list of Flights, use:
List<Flight> newFlights =

    JsonConvert.DeserializeObject<List<Flight>>(flightsString);
If you'd rather not create a whole class, you can also deserialize "raw" JSON, which is very handy when you're getting results from a webservice. For example:
JObject o = JObject.Parse(responseString);

JObject flightsJson = (JObject)o["flights"];

int numFlights = (int)flightsJson["total_entries"];

JObject flightJson = (JObject)((JArray)flightsJson["array"])[0];
Local database
You can also store data in a full database. This takes a bit more coding, but is useful if you need to do queries, etc. I use this in PhotoNotes - each photo gets a row in the database with a caption and audio filename. (which are stored in Isolated Storage Files!) Here's the topic on MSDN about a local database, but briefly, the steps you need are:
First, declare your DataContext:
public class PicturesDataContext : DataContext

{

    // Specify the connection string as a static, used in main page and app.xaml

    public static string DBConnectionString = "Data Source=isostore:/PictureNotes.sdf";


    // Pass the connection string to the base class.

    public PicturesDataContext(string connectionString)

        : base(connectionString) { }


    // Specify a single table

    public Table PictureNotes;

}
Then on your table class, you need the Table attribute:
[Table]

public class PictureNote : INotifyPropertyChanged, INotifyPropertyChanging
and then member fields with the Column attribute are columns in the table:
[Column(CanBeNull=true)]

public string FileName

{
Now, to insert rows, you can create new instances of the PictureNote class and call InsertOnSubmit() on the table:
_noteLensDB.PictureNotes.InsertOnSubmit(new PictureNote()

    { FileName = shortFileName, NoteText = noteText,

      NoteAudioFileName = _lastSavedAudioFileName });

_noteLensDB.SubmitChanges();
And to query the table, you can use the totally cool LINQ to SQL. For example:
var query = from n in _noteLensDB.PictureNotes

            where ((n.NoteText != "" && n.NoteText != null) || n.NoteAudioFileName != null)

            select n;

var numPictures = query.Count();

foreach (var note in query)

{

    string name = note.FileName;

}
--
See all my Windows Phone development posts.
I'm planning on writing more posts about Windows Phone development - what would you like to hear about? Reply here, on twitter at @gregstoll, or by email at ext-greg.stoll@nokia.com.
--
Interested in developing for Windows Phone? I'm the Nokia Developer Ambassador for Austin - drop me a line at ext-greg.stoll@nokia.com!
0 comments
Windows Phone: writing a pinch and zoom image control
Mood: happy
Posted on 2013-02-10 22:20:00
Tags: windowsphone wpdev
Words: 989
When I was working on FlightPredictor and was working on showing airport maps, I was surprised there was no builtin "pinch and zoom image control" in the Windows Phone SDK. (to be fair, there wasn't one in Android either, and I'm not sure about iOS) So I had to implement my own, with some help from the Internet.
If I were doing this today, I'd just use the PanAndZoom control from Telerik's RadControls for Windows Phone. (which comes with the Nokia Premium Developer Program! Just sayin') But I did go through the trouble to implement it, so hopefully it will help someone out. Ed: another good solution is the SharpGIS ImageViewer - I haven't tried it, but it looks like it works well and you don't have to type in a bunch of code :-)
To see an example of how this works, you can download a trial version of FlightPredictor, download the airport maps and then play with them. This code supports pinching to zoom, panning, a maximum zoom level, and double-tap to zoom in or out.
XAML code
Here's the relevant part of the XAML:
<Image x:Name="MapImage" Stretch="Uniform"

       RenderTransformOrigin="0,0" CacheMode="BitmapCache"

       SizeChanged="MapImage_SizeChanged">

    <toolkit:GestureService.GestureListener>

        <toolkit:GestureListener

            PinchStarted="GestureListener_PinchStarted"

            PinchDelta="GestureListener_PinchDelta"

            DragDelta="GestureListener_DragDelta"

            DoubleTap="GestureListener_DoubleTap"/>

    </toolkit:GestureService.GestureListener>

    <Image.RenderTransform>

        <CompositeTransform

            ScaleX="1" ScaleY="1"

            TranslateX="0" TranslateY="0"/>

    </Image.RenderTransform>

</Image>
Note that the GestureListener is from the Windows Phone Toolkit, which is a (free!) must-have. It also requires you to have this inside the PhoneApplicationPage XML element:
xmlns:toolkit=

"clr-namespace:Microsoft.Phone.Controls;assembly=Microsoft.Phone.Controls.Toolkit"
C# code
First, some variables to declare in your PhoneApplicationPage:
private bool _needToUpdateMaxZoom = false;

private int _imageHeight = 0;

private int _imageWidth = 0;

// Reference

// these two fields fully define the zoom state:

private double _totalImageScale = 1.0;

private Point _imagePosition = new Point(0, 0);


private double _maxImageZoom = 1;

private Point _oldFinger1;

private Point _oldFinger2;

private double _oldScaleFactor;
Now you need to get a BitmapImage containing the image to display. How you do this depends on where you're getting the image from, but here's how I do it for files stored in IsolatedStorage:
byte[] data;


// Read the entire image in one go into a byte array

using (IsolatedStorageFile isf = IsolatedStorageFile.GetUserStoreForApplication())

{

    // Open the file - error handling omitted for brevity

    // Note: If the image does not exist in isolated storage

    // the following exception will be generated:

    // System.IO.IsolatedStorage.IsolatedStorageException was unhandled

    // Message=Operation not permitted on IsolatedStorageFileStream

    using (IsolatedStorageFileStream isfs = isf.OpenFile("/airportMaps/" +

              info.Url, FileMode.Open, FileAccess.Read))

    {

        // Allocate an array large enough for the entire file

        data = new byte[isfs.Length];


        // Read the entire file and then close it

        isfs.Read(data, 0, data.Length);

        isfs.Close();

    }

}


// Create memory stream and bitmap

MemoryStream ms = new MemoryStream(data);

BitmapImage bi = new BitmapImage();


// Set bitmap source to memory stream

bi.SetSource(ms);
After you've set up your BitmapImage, add the following code right afterwards:
_imageHeight = bi.PixelHeight;

_imageWidth = bi.PixelWidth;

_imagePosition = new Point(0, 0);

_totalImageScale = 1;


// set max zoom in

if (MapImage.ActualWidth == 0.0 || MapImage.ActualHeight == 0.0)

{

    _needToUpdateMaxZoom = true;

}

else

{

    UpdateMaxZoom();

    UpdateImageScale(1.0);

    UpdateImagePosition(new Point(0, 0));

}


// Assign the bitmap image to the image’s source

MapImage.Source = bi;
Now, all that's left is to implement the GestureListener events, as well as a few utility methods:
private void MapImage_SizeChanged(object sender, SizeChangedEventArgs e)

{

    if (_needToUpdateMaxZoom)

    {

        if (MapImage.ActualHeight != 0.0 && MapImage.ActualWidth != 0.0)

        {

            UpdateMaxZoom();

        }

    }

}


private void UpdateMaxZoom()

{

    // this is already stretched, so this gets tricky

    _maxImageZoom = Math.Min(_imageHeight / MapImage.ActualHeight,

        _imageWidth / MapImage.ActualWidth);

    _maxImageZoom *= Math.Max(1.0,

        Math.Max(_imageHeight / MapImage.ActualHeight, _imageWidth / MapImage.ActualWidth));

    const double MAX_ZOOM_FACTOR = 2;

    _maxImageZoom *= MAX_ZOOM_FACTOR;

    _maxImageZoom = Math.Max(1.0, _maxImageZoom);

    _needToUpdateMaxZoom = false;

    UpdateImageScale(1.0);

    UpdateImagePosition(new Point(0, 0));

}


private void GestureListener_PinchStarted(object sender, PinchStartedGestureEventArgs e)

{

    _oldFinger1 = e.GetPosition(MapImage, 0);

    _oldFinger2 = e.GetPosition(MapImage, 1);

    _oldScaleFactor = 1;

}


private void GestureListener_PinchDelta(object sender, PinchGestureEventArgs e)

{

    var scaleFactor = e.DistanceRatio / _oldScaleFactor;

    if (!IsScaleValid(scaleFactor))

        return;


    var currentFinger1 = e.GetPosition(MapImage, 0);

    var currentFinger2 = e.GetPosition(MapImage, 1);


    var translationDelta = GetTranslationDelta(currentFinger1, currentFinger2,

        _oldFinger1, _oldFinger2, _imagePosition, scaleFactor);


    _oldFinger1 = currentFinger1;

    _oldFinger2 = currentFinger2;

    _oldScaleFactor = e.DistanceRatio;


    UpdateImageScale(scaleFactor);

    UpdateImagePosition(translationDelta);

}


private void GestureListener_DragDelta(object sender, DragDeltaGestureEventArgs e)

{

    var translationDelta = new Point(e.HorizontalChange, e.VerticalChange);


    if (IsDragValid(1, translationDelta))

        UpdateImagePosition(translationDelta);

}


private void GestureListener_DoubleTap(object sender, Microsoft.Phone.Controls.GestureEventArgs e)

{

    if (Math.Abs(_totalImageScale - 1) < .0001)

    {

        const double DOUBLE_TAP_ZOOM_IN = 3;

        double imageScale = Math.Min(DOUBLE_TAP_ZOOM_IN, _maxImageZoom);


        Point imagePositionTapped = e.GetPosition(MapImage);

        // we want this point to be centered.

        double x = imagePositionTapped.X * imageScale - (MapImage.ActualWidth / 2);

        double y = imagePositionTapped.Y * imageScale - (MapImage.ActualHeight / 2);

        Point imageDelta = new Point(-1*x, -1*y);

        // FFV - animation?

        UpdateImageScale(imageScale);

        UpdateImagePosition(imageDelta);

    }

    else

    {

        ResetImagePosition();

    }

}


private Point GetTranslationDelta(Point currentFinger1, Point currentFinger2,

      Point oldFinger1, Point oldFinger2, Point currentPosition, double scaleFactor)

{

    var newPos1 = new Point(currentFinger1.X + (currentPosition.X - oldFinger1.X) * scaleFactor,

        currentFinger1.Y + (currentPosition.Y - oldFinger1.Y) * scaleFactor);

    var newPos2 = new Point(currentFinger2.X + (currentPosition.X - oldFinger2.X) * scaleFactor,

        currentFinger2.Y + (currentPosition.Y - oldFinger2.Y) * scaleFactor);

    var newPos = new Point((newPos1.X + newPos2.X) / 2, (newPos1.Y + newPos2.Y) / 2);

    return new Point(newPos.X - currentPosition.X, newPos.Y - currentPosition.Y);

}


private void UpdateImageScale(double scaleFactor)

{

    _totalImageScale *= scaleFactor;

    ApplyScale();

}


private void ApplyScale()

{

    ((CompositeTransform)MapImage.RenderTransform).ScaleX = _totalImageScale;

    ((CompositeTransform)MapImage.RenderTransform).ScaleY = _totalImageScale;

}


private void UpdateImagePosition(Point delta)

{

    var newPosition = new Point(_imagePosition.X + delta.X, _imagePosition.Y + delta.Y);

    if (newPosition.X > 0) newPosition.X = 0;

    if (newPosition.Y > 0) newPosition.Y = 0;


    if ((MapImage.ActualWidth * _totalImageScale) + newPosition.X < MapImage.ActualWidth)

        newPosition.X = MapImage.ActualWidth - (MapImage.ActualWidth * _totalImageScale);


    if ((MapImage.ActualHeight * _totalImageScale) + newPosition.Y < MapImage.ActualHeight)

        newPosition.Y = MapImage.ActualHeight - (MapImage.ActualHeight * _totalImageScale);


    _imagePosition = newPosition;


    ApplyPosition();

}


private void ApplyPosition()

{

    ((CompositeTransform)MapImage.RenderTransform).TranslateX = _imagePosition.X;

    ((CompositeTransform)MapImage.RenderTransform).TranslateY = _imagePosition.Y;

}


private void ResetImagePosition()

{

    _totalImageScale = 1;

    _imagePosition = new Point(0, 0);

    ApplyScale();

    ApplyPosition();

}


private bool IsDragValid(double scaleDelta, Point translateDelta)

{

    if (_imagePosition.X + translateDelta.X > 0 || _imagePosition.Y + translateDelta.Y > 0)

        return false;

    if ((MapImage.ActualWidth * _totalImageScale * scaleDelta) +

        (_imagePosition.X + translateDelta.X) < MapImage.ActualWidth)

        return false;

    if ((MapImage.ActualHeight * _totalImageScale * scaleDelta) +

        (_imagePosition.Y + translateDelta.Y) < MapImage.ActualHeight)

        return false;

    return true;

}


private bool IsScaleValid(double scaleDelta)

{

    return (_totalImageScale * scaleDelta >= 1) &&

           (_totalImageScale * scaleDelta <= _maxImageZoom);

}
and that's it! Some things you can tweak:
- The maximum you can zoom in is 2x of the original image size. You can change this by modifying MAX_ZOOM_FACTOR in UpdateMaxZoom().
- When you double-tap on the image, if it's currently zoomed out it zooms in to 3x. You can change this by modifying DOUBLE_TAP_ZOOM_IN in GestureListener_DoubleTap.
I'm also not entirely sure the math is right in various places, but it works well enough on the size of images I tend to deal with. It would also be nice to add inertial scrolling...
Hope this is helpful! I took a lot of this code from this blog post.
--
See all my Windows Phone development posts.
I'm planning on writing more posts about Windows Phone development - what would you like to hear about? Reply here, on twitter at @gregstoll, or by email at ext-greg.stoll@nokia.com.
--
Interested in developing for Windows Phone? I'm the Nokia Developer Ambassador for Austin - drop me a line at ext-greg.stoll@nokia.com!
4 comments
Windows Phone: promotion for new developers: write an app, get a Lumia 800!
Posted on 2013-01-21 00:36:00
Tags: nokia windowsphone wpdev
Words: 328
This promotion has ended - thanks to all who participated!
In addition to the existing promotion for writing new apps, I'm happy to announce a new promotion for new Windows Phone developers!
The rules are pretty simple: write a new app and send it to me for testing/feedback. Once you do that I will send you a Windows Phone dev center token (a $99 value) and help get you signed up to DVLUP. Once the app is in the store and you've submitted it for a DVLUP challenge, I'll send you a Lumia 800! Since the Windows Phone 7.8 update is coming soon those 800's will be even more exciting!
As with the other promotion, the fine print:
- Promotion is limited to developers in US and Canada.
- Device quantities are limited - they will be handed out on a first-come first-served basis.
- The app must include a version targeted to Windows Phone 8. (I can help you with this!)
- Only quality apps qualify; the final decision of what constitutes a quality app resides with me
- You cannot have entered the same app in any other promotion through which you got a Windows Phone device.
- I reserve the right to change the terms of the promotion at any time
- You will be solely responsible for taxes, if any, on the items you receive as part of any of these promotions.
- Shipping is free to destinations within continental United States, shipping to other locations will be borne by the receiver.
- By participating in any of these promotions, you accept the terms and conditions of any such promotions, and you agree that neither I nor Nokia is responsible in any way for any costs, losses, or harm that you sustain by participating in any such promotion.
So: get coding! Here are some articles I've written about developing for Windows Phone to get you started.
--
Interested in developing for Windows Phone? I'm the Nokia Developer Ambassador for Austin - drop me a line at ext-greg.stoll@nokia.com!
2 comments
Windows Phone: debugging crashes in a released app
Mood: content
Posted on 2013-01-19 18:45:00
Tags: windowsphone wpdev
Words: 415
Unfortunately, bugs are a fact of life, and your app will probably crash occasionally in the wild. But, there are a few nifty tools to help you debug them after the fact.
I wrote about Little Watson a while ago, and while it's helpful, it does require the user to send in a report. Microsoft provides data in the Windows Phone Dev Center that doesn't require the user to do anything - here's how to use it!
Step 1: Get the data
Log in to the Windows Phone Dev Center and go to the Dashboard. At the bottom of the page there's a "Highlights" section that shows app downloads - click on the little arrows at the bottom to see crash count statistics:
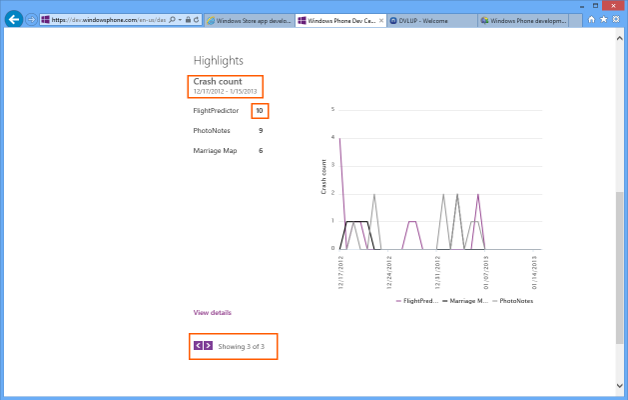
(click for full image)
For the app you're interested in, click on the number next to it - in this case we're going to be looking at FlightPredictor.
Now you'll see a screen like this:
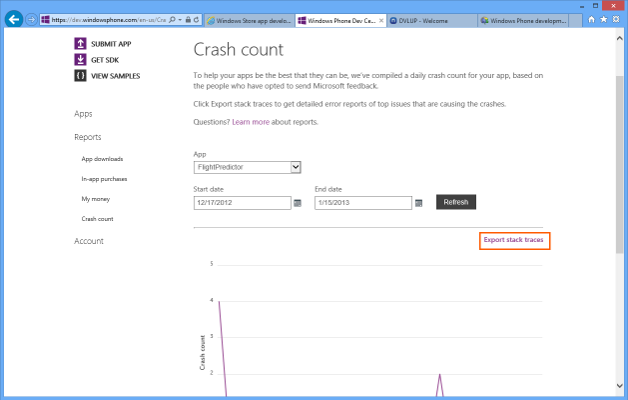
(click for full image)
Click on "Export stack traces" - this will download and open an Excel file with the crash data.
Step 2: Analyze the data
You should see something like this:
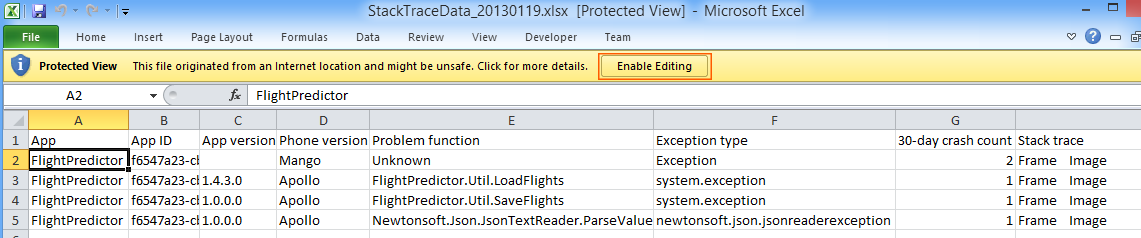
Go ahead and click the "Enable Editing" button at the top.
Most columns you see should be pretty self-explanatory. Note that "Mango" is OS 7.5 and "Apollo" is 8.0. The call stacks are grouped together - you can see in my example that the top row has 2 crashes, so it's the most common one.
For this crash the problem function is "Unknown", which isn't terribly helpful. So let's look at the full stack trace - move over to that cell and press F2 to see it (and press Up to get to the top of the text). And we see:
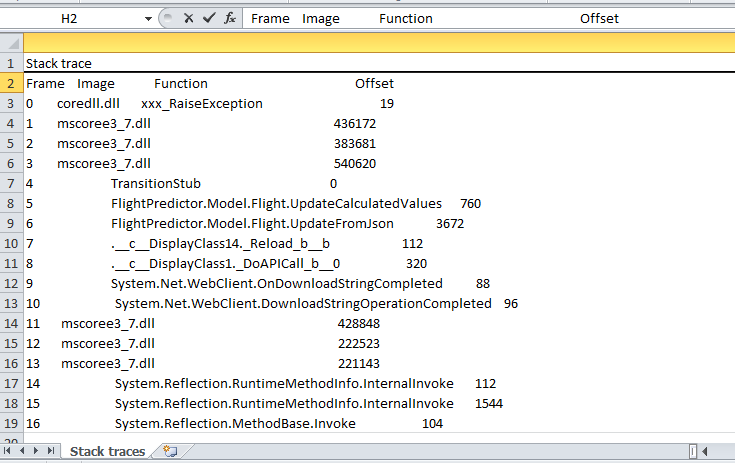
So we can see the most recent call in the stack is FlightPredictor.Model.Flight.UpdateCalculatedValues(), and hopefully the call stack will help you track down why the app is crashing.
I tried to use the offset to find what line of code the crash is happening on, but I couldn't make it match up with IL offsets or native offsets (see this MSDN thread). I'll update this post if I find out how to make it work.
--
See all my Windows Phone development posts.
I'm planning on writing more posts about Windows Phone development - what would you like to hear about? Reply here, on twitter at @gregstoll, or by email at ext-greg.stoll@nokia.com.
--
Interested in developing for Windows Phone? I'm the Nokia Developer Ambassador for Austin - drop me a line at ext-greg.stoll@nokia.com!
0 comments
Windows Phone: earn a Lumia 800 or 900!
Mood: sick
Posted on 2013-01-12 15:57:00
Tags: nokia windowsphone wpdev
Words: 302
This promotion has ended - thanks to all who participated!
There's a new promotion for new Windows Phone developers - check it out!
Here's a chance to earn a Nokia Lumia 800 or 900! Here's how:
- Submit three new apps to the Windows Phone Store and get a free Lumia 800
- Submit five new apps to the Windows Phone Store and get a free Lumia 900
You must be a member of DVLUP to win - contact me at ext-greg.stoll@nokia.com if you need an invite code. Note that you can also use these apps to earn points in DVLUP challenges, so it's a win-win!
The fine print:
- Promotion is limited to developers in US and Canada.
- Device quantities are limited - they will be handed out on a first-come first-served basis.
- Only quality apps qualify; the final decision of what constitutes a quality app resides with me
- New apps means apps first published in the Windows Phone Store after January 7, 2013.
- You cannot have entered the same app in any other promotion through which you got a Windows Phone device.
- I reserve the right to change the terms of the promotion at any time
- You will be solely responsible for taxes, if any, on the items you receive as part of any of these promotions.
- Shipping is free to destinations within continental United States, shipping to other locations will be borne by the receiver.
- By participating in any of these promotions, you accept the terms and conditions of any such promotions, and you agree that neither I nor Nokia is responsible in any way for any costs, losses, or harm that you sustain by participating in any such promotion.
--
See all my Windows Phone development posts.
Interested in developing for Windows Phone? I'm the Nokia Developer Ambassador for Austin - drop me a line at ext-greg.stoll@nokia.com!
0 comments
Windows Phone: adding enum settings to your app
Mood: sick
Posted on 2013-01-11 21:10:00
Tags: windowsphone wpdev
Words: 447
After my last post about adding a settings page to your app, I thought I'd follow it up by adding an enum-like type to the page. Enums and booleans are (at least in my apps!) the most common types of settings, and enums are slightly trickier than the Boolean settings we saw last time.
For this example, I'm going to be adding a QuestionDirection "enum" to my settings page.
Step 1: Add the "enum" class
First, you need a QuestionDirection.cs:
using System;

using System.Collections.Generic;

using System.Collections.ObjectModel;

using System.Linq;

using System.Text;


namespace KnowYourStates.wp7

{

    public class QuestionDirection

    {

        public string Name { get; set; }

        public string DisplayName { get; set; }

        public bool HasForward { get; set; }

        public bool HasBackward { get; set; }

        private static QuestionDirection _forward = new QuestionDirection()

            { Name = "forward", DisplayName = "Forward", HasBackward = false, HasForward = true};

        private static QuestionDirection _backwards = new QuestionDirection()

            { Name = "backwards", DisplayName = "Backward", HasBackward = true, HasForward = false };

        private static QuestionDirection _both = new QuestionDirection()

            { Name = "both", DisplayName = "Forward + Backward", HasBackward = true, HasForward = true };

        private static Collection<QuestionDirection> _directions = null;

        public static QuestionDirection Default

        {

            get

            {

                return _both;

            }

        }

        public static Collection<QuestionDirection> Directions

        {

            get

            {

                if (_directions == null)

                {

                    _directions = new Collection<QuestionDirection>();

                    _directions.Add(_forward);

                    _directions.Add(_backwards);

                    _directions.Add(_both);

                }

                return _directions;

            }

        }

        public override string ToString()

        {

            return DisplayName;

        }


    }

}
Here the important parts are the Default property and the Directions property. (the ToString() method is necessary to make it look right in the ListPicker we're going to use, but how you implement it is up to you)
Step 2: Modify UserSettings.cs
In your UserSettings.cs (see the previous post for the necessary parts), add the following:
        const string QuestionDirectionKeyName = "QuestionDirection";

        QuestionDirection QuestionDirectionDefault;


        public QuestionDirection QuestionDirection

        {

            get

            {

                return GetValueOrDefault<QuestionDirection>(QuestionDirectionKeyName, QuestionDirectionDefault);

            }

            set

            {

                if (AddOrUpdateValue(QuestionDirectionKeyName, value))

                {

                    Save();

                }

            }

        }


        public Collection<QuestionDirection> AllQuestionDirections

        {

            get

            {

                return QuestionDirection.Directions;

            }

        }
and then to the constructor, add
QuestionDirectionDefault = QuestionDirection.Default;
Step 3: Add a control to the Settings page
Here's the XAML for the Settings PivotItem:
<controls:PivotItem x:Name="SettingsPivotItem" Header="settings">

   <StackPanel Orientation="Vertical">

       <TextBlock Text="Question Mode:" FontSize="{StaticResource PhoneFontSizeLarge}"/>

       <toolkit:ListPicker ItemsSource="{Binding Source={StaticResource appSettings}, Path=AllQuestionDirections}"

           SelectedItem="{Binding Source={StaticResource appSettings}, Path=QuestionDirection, Mode=TwoWay}"/>

    </StackPanel>

</controls:PivotItem>
Note that the ListPicker is from the Windows Phone Toolkit, which is a (free!) must-have. It also requires you to have this inside the PhoneApplicationPage XML element:
xmlns:toolkit="clr-namespace:Microsoft.Phone.Controls;assembly=Microsoft.Phone.Controls.Toolkit"
Just like in the previous post, you can listen for the appSettings changing, and you can access the current setting with UserSettings.Instance.QuestionDirection.
Again, this isn't really that difficult, but whenever I need to do it I find this code and copy it, so now you can too!
--
See all my Windows Phone development posts.
I'm planning on writing more posts about Windows Phone development - what would you like to hear about? Reply here, on twitter at @gregstoll, or by email at ext-greg.stoll@nokia.com.
--
Interested in developing for Windows Phone? I'm the Nokia Developer Ambassador for Austin - drop me a line at ext-greg.stoll@nokia.com!
0 comments
Windows Phone: how to get accent color in your app
Mood: cheerful
Posted on 2013-01-02 23:20:00
Tags: windowsphone wpdev
Words: 227
As I mentioned in my post about icon design, I'm terrible at art, and I'm also not very good at making apps attractive.
But I do know that a splash of color helps, and since Windows Phone has user-selectable themes, you can use the theme accent color and make the app look "at home" on the phone, since the Start screen will have the theme accent color all over the place.
In XAML, this is very simple, for example for a TextBlock you can use Runs like:
<TextBlock TextWrapping="Wrap">

    <Run>Better with a</Run>

    <Run Foreground="{StaticResource PhoneAccentBrush}">splash</Run>

    <Run>of color!</Run>

</TextBlock>
and in C# you can get a Brush with
Brush accent = Application.Current.Resources["PhoneAccentBrush"] as Brush;
There are a lot of these resources available per theme, including other Brushes, font sizes, etc. Here's a useful reference page that has all of the theme resources.
Note: @YiXueDictionary pointed out that using the "as" operator is a little faster than casting (and looks a little nicer) - see this post for a performance comparison of various casting mechanisms in .NET.
--
See all my Windows Phone development posts.
I'm planning on writing more posts about Windows Phone development - what would you like to hear about? Reply here, on twitter at @gregstoll, or by email at ext-greg.stoll@nokia.com.
--
Interested in developing for Windows Phone? I'm the Nokia Developer Ambassador for Austin - drop me a line at ext-greg.stoll@nokia.com!
0 comments
Windows Phone: adding settings to your app
Mood: cheerful
Posted on 2012-12-13 23:09:00
Tags: windowsphone wpdev
Words: 861
I like including a lot of settings in my apps - it gives the user a lot of control about how the app looks/behaves. But it's a little tedious to add the code to save them to Isolated Storage, notify when they've changed, and allowing the user to change them on a settings page. After just doing this for a new release of PhotoNotes, I thought I'd write a step-by-step guide to adding settings to an app.
In this example, I was adding a boolean setting for whether PhotoNotes's tile should be live. So, let's get started!
Step 1: Add a UserSettings class
This class will provide access to the settings and handle saving/loading to Isolated Storage, as well as have an event for when the settings have changed.
Here's the actual UserSettings class for PhotoNotes. If you prefer you can also download UserSettings.cs here.
using System;

using System.Net;

using System.Windows;

using System.Windows.Controls;

using System.Windows.Documents;

using System.Windows.Ink;

using System.Windows.Input;

using System.Windows.Media;

using System.Windows.Media.Animation;

using System.Windows.Shapes;

using System.IO.IsolatedStorage;

using System.Collections.ObjectModel;


namespace NoteLens.wp8

{

    public class UserSettings

    {

        IsolatedStorageSettings settings;

        public event EventHandler SettingsChanged;


        const string TilePictures = "TilePictures";


        const bool TilePicturesDefault = true;


        public bool ShowTilePictures

        {

            get

            {

                return GetValueOrDefault(TilePictures, TilePicturesDefault);

            }

            set

            {

                if (AddOrUpdateValue(TilePictures, value))

                {

                    Save();

                }

            }

        }


        public static UserSettings Instance = null;

        // This can't be private because it's called from the XAML in App.xaml,

        // but don't create one of these in code!

        public UserSettings()

        {

            try

            {

                settings = IsolatedStorageSettings.ApplicationSettings;

                if (Instance == null)

                {

                    Instance = this;

                }

                else

                {

                    System.Diagnostics.Debug.Assert(false,

                      "Created multiple UserSettings!");

                }

            }

            catch (Exception)

            {

                settings = null;

            }

        }


        ///

        /// Update a setting value for our application. If the setting does not

        /// exist, then add the setting.

        ///

        ///

        ///

        ///

        public bool AddOrUpdateValue(string Key, Object value)

        {

            bool valueChanged = false;


            // If the key exists

            if (settings.Contains(Key))

            {

                // If the value has changed

                if (settings[Key] != value)

                {

                    // Store the new value

                    settings[Key] = value;

                    valueChanged = true;

                }

            }

            // Otherwise create the key.

            else

            {

                settings.Add(Key, value);

                valueChanged = true;

            }

            return valueChanged;

        }


        ///

        /// Get the current value of the setting, or if it is not found, set the

        /// setting to the default setting.

        ///

        ///

        ///

        ///

        ///

        public T GetValueOrDefault<T>(string Key, T defaultValue)

        {

            T value;


            // If the key exists, retrieve the value.

            if (settings.Contains(Key))

            {

                value = (T)settings[Key];

            }

            // Otherwise, use the default value.

            else

            {

                value = defaultValue;

            }

            return value;

        }


        ///

        /// Save the settings.

        ///

        public void Save()

        {

            settings.Save();

            EventHandler settingsChanged = SettingsChanged;

            if (settingsChanged != null)

            {

                settingsChanged(this, new EventArgs());

            }

        }


    }

}
The bottom part of this file (from the constructor down) is pretty boilerplate. If you want to add a new setting, all you have to do is define a new key name (like TilePictures here), a new default value (like TilePicturesDefault) and the name of the property that exposes it (like ShowTilePictures) - then you can just copy and paste the existing property and make the three replacements.
Step 2: Define a resource for your UserSettings
This will let you easily access the UserSettings from XAML and code.
In your App.xaml, first make sure you have a namespace added for wherever your UserSettings class is. I didn't, so I had to add
xmlns:nl="clr-namespace:NoteLens.wp8"
to my <Application> tag.
Then, inside the <Application.Resources> tag, add
<nl:UserSettings x:Key="appSettings"/>
Step 3: Add a control to change the setting to a page
I already had an About page in the app (possible future post!) which used a Pivot control, so I just made the settings a new PivotItem under that.
The best way to show a Boolean value is to use a ToggleSwitch, which is part of the Windows Phone toolkit which is put out by Microsoft. So first, make sure you have that installed - I had to install it with NuGet. Now, here's the XAML for adding the new PivotItem and control:
            <controls:PivotItem Header="settings">

                <StackPanel Orientation="Vertical">

                    <toolkit:ToggleSwitch IsChecked="

                           {Binding Source={StaticResource appSettings},

                            Path=ShowTilePictures, Mode=TwoWay}">

                        Live Tile

                    </toolkit:ToggleSwitch>

                </StackPanel>

            </controls:PivotItem>
Here we're binding to the appSettings resource we declared in step 2, and through the magic of data binding this will show the current value of the setting and also let the user change it.
Step 4: Listen for when the setting changes
We're almost done! In this case, I wanted to know when the user changed the setting so I could immediately update the tile to make it live or not. So, in About.xaml.cs (the codebehind for the About page) I made the following changes:
To OnNavigatedTo(), added
UserSettings.Instance.SettingsChanged += appSettings_SettingsChanged;
To OnNavigatedFrom(), added
UserSettings.Instance.SettingsChanged -= appSettings_SettingsChanged;
And finally added the method:
        void appSettings_SettingsChanged(object sender, EventArgs e)

        {

            Util.UpdateLiveTile();

        }
Step 5: Use the setting in code
This is obviously very app-dependent, but to get the value of the setting in code you should use
UserSettings.Instance.ShowTilePictures
It's important to always use UserSettings.Instance and not create a new UserSettings class instance to access the settings, otherwise your SettingsChanged events might not fire in the right places. I added an assert to ensure that we only ever create one of them, and that will happen when the app resources are created from App.xaml.
In this example, we just added a boolean setting - see this follow-up post for adding an enum-like setting.
--
See all my Windows Phone development posts.
I'm planning on writing more posts about Windows Phone development - what would you like to hear about? Reply here, on twitter at @gregstoll, or by email at ext-greg.stoll@nokia.com.
--
Interested in developing for Windows Phone? I'm the Nokia Developer Ambassador for Austin - drop me a line at ext-greg.stoll@nokia.com!
0 comments
Windows Phone: implementing fast app switching (needed for DVLUP!)
Mood: tired
Posted on 2012-12-10 23:30:00
Tags: windowsphone wpdev
Words: 348
Since my last post talked about making a Live Tile update, which is needed for the DVLUP challenges, I thought I'd talk about a different requirement - Fast App Switching.
The key to implementing Fast App Switching is understanding the lifecycle of an app. The MSDN page on App activation and deactivation for Windows Phone is an excellent guide, and I refer to it often. The table at the bottom of the page is a quick guide to what you need to do to support app suspend/resume, including Fast App Switching.
Here's a quick example in code. Let's assume the MainPage just has one TextBox on it whose contents we want to preserve if the user switches away from the app.
// a bunch of code omitted

public partial class MainPage : PhoneApplicationPage {

    private bool _isNewPageInstance = false;


    public MainPage()

    {

        InitializeComponent();

        _isNewPageInstance = true;

    }


    protected override void OnNavigatedTo(System.Windows.Navigation.NavigationEventArgs e) {

        base.OnNavigatedTo(e);

        if (_isNewPageInstance)

        {

            if (State.Count > 0)

            {

                // this assumes you always save everything

                // if not, check with State.ContainsKey()

                myTextBox.Text = State["TextBoxContents"] as string;

            }

        }

    }


    protected override void OnNavigatedFrom(System.Windows.Navigation.NavigationEventArgs e) {

        base.OnNavigatedFrom(e);

        if (e.NavigationMode != System.Windows.Navigation.NavigationMode.Back)

        {

            // save state for all controls

            State["TextBoxContents"] = myTextBox.Text;

        } else {

            // navigating back, so don't save any state

            State.Clear();

        }

    }

}
If you have any state that you want to persist throughout the app, you can do a similar thing with PhoneApplicationService.State, and listening in the PhoneApplicationService.Activated and PhoneApplicationService.Deactivated events.
It's easy to test the case when your app gets deactivated and quickly reactivated (just press the start button, then hold the back button and switch back to it), but testing the tombstoned case is important too. To test this, in the project settings under "Debug", there's a checkbox called "Tombstone upon deactivation while debugging" - just turn that on, debug the app, and switch away and switch back. You may uncover all kinds of bugs :-)
--
See all my Windows Phone development posts.
I'm planning on writing more posts about Windows Phone development - what would you like to hear about? Reply here, on twitter at @gregstoll, or by email at ext-greg.stoll@nokia.com.
--
Interested in developing for Windows Phone? I'm the Nokia Developer Ambassador for Austin - drop me a line at ext-greg.stoll@nokia.com!
0 comments
Windows Phone: updating your app's tile, simply (needed for DVLUP!)
Mood: cheerful
Posted on 2012-12-08 23:54:00
Tags: windowsphone wpdev
Words: 343
Windows Phone Live Tiles are great, but setting up push notifications is a lot of work, and even running a background agent comes with limitations. There are two easier ways to update your live tile:
- One way is to just update it when the app runs. This is not as appealing to the user as one that updates in the background, but for some apps it might be good enough. For example, I'm going to do this in my Marriage Map app, as the data doesn't change very often.
To do this, here's some sample code:
    var tileEnum = ShellTile.ActiveTiles.GetEnumerator();

    tileEnum.MoveNext();

    var tile = tileEnum.Current;

#if WP8

    FlipTileData ftd = new FlipTileData();

#else

    StandardTileData ftd = new StandardTileData();

#endif

    // This next part is app dependent

    ftd.BackContent = "back of a medium tile";

#if WP8

    ftd.WideBackContent = "back of a wide tile";

#endif

    tile.Update(ftd);
Note that the code inside #if WP8 only works in the Windows Phone 8 SDK - I'm using the MSDN guide to share code between a WP7 and WP8 app, which has worked out great for me.
- Another way is to set up a schedule where the tile will update every hour (or so). The limitation to this technique is that you can only update the background image for the front of a tile this way, but for some apps this might not be an issue. To do this, see How to send a scheduled local Tile update for Windows Phone.
Note that the DVLUP challenges all require that your appInclude all 3 sizes of Live Tiles (must animate between at least 2 frames within the tile space with data, images, or text).
so if you want to earn rewards during Pointstravaganza, you'll need to do something to make your tiles live!
--
See all my Windows Phone development posts.
I'm planning on writing more posts about Windows Phone development - what would you like to hear about? Reply here, on twitter at @gregstoll, or by email at ext-greg.stoll@nokia.com.
--
Interested in developing for Windows Phone? I'm the Nokia Developer Ambassador for Austin - drop me a line at ext-greg.stoll@nokia.com!
0 comments
O'Reilly books 50% off - good Windows Phone 8 book available!
Mood: happy
Posted on 2012-11-26 13:24:00
Tags: windowsphone wpdev
Words: 49
O'Reilly is having a big Cyber Monday sale today - everything's 50% off! I'd recommend Windows® Phone 8 Development Internals - it's still a "preview", but if you buy it now you get access to the full book when it's done. I've read the preview and so far it's quite good.
0 comments
Designing an icon for your Windows Phone app
Mood: cheerful
Posted on 2012-11-25 20:04:00
Tags: windowsphone wpdev
Words: 748
I'm terrible at art, so when I'm developing an app I've learned to dread when it comes time to design an icon. Fortunately, I've done it enough times that I've got a decent process down. Hopefully this will help you get at least halfway-decent icons for your Windows Phone app!
Step 1: Install GIMP - it's free and works great as an icon creation tool. I'm by no means an expert at it, but if you've never used it before I'd recommend looking at some basic tutorials, like "The Basics" (just ignore all the drop shadow stuff!) and "GIMPlite Quickies" for a bit of image manipulation.
Step 2: Find a few icons to represent the app - this can be the hardest part, depending on what your app does. Here are some sites I've had success with:
Small icons
- Glyphish ($25, or free with attribution) - the icons are small, but there are a lot of them. I've used Glyphish icons in a few of my apps, including the one I'm working on now. It's worth $25!
- Syncfusion Metro Studio (free) - 600 Modern-style icons
- Silk (free) - 700 icons, although they're all rather small at 16x16
- Ikonic ($5 for PNGs) - 150 icons that are a bit larger
- Batch (now free!) - 300 icons, although they appear to require Photoshop
- The Noun Project (prices vary, many are free) - many black and white icons. These are good choices if you go with a transparent icon (described later)
Bigger icons
- Cutcaster (prices vary) - I used Cutcaster extensively for the city backgrounds in FlightPredictor for Windows 8. They have a pretty good selection, the pricing is reasonable, and many images don't require any sort of attribution.
Step 3: Decide on a full-color or transparent icon
There are two styles I consider for icons: a "full-color" one, such as the one for FlightPredictor:

or a "transparent" one, such as the one for this new app I'm working on:

In this one, the icon itself is white, and the background is transparent (I made it brown here so it's visible) and matches the theme color of the phone. This is a nice effect, especially if the icon itself is fairly simple. I didn't use this for FlightPredictor because the clock icon would have been obscured.
If you do decide on a full-color icon - don't forget that gradients look out of place on Windows Phone! The FlightPredictor icons on other platforms has a slight gradient over the length of the plane, but I changed that to a solid color for Windows Phone.
Step 4: Create a blank app icon
It's always easiest to start with the largest icon you'll need and scale down from there. For Windows Phone 7 this is 173x173, and for Windows Phone 8 this is 336x336 for the medium tile. (for the large tile I'd copy from the medium one into the large one, which is of size 691x336) The sizes are different for iconic live tiles - see this page on tile resolutions.
For transparent icons, it's easiest to create the app icon with a transparent background, then paste the icon parts in and turn them all white.
Step 5: Copy the parts into the app icon
If you've followed the steps until now, this shouldn't be that hard. Keep in mind that you will need to leave some blank space at the bottom of the tile for the name of the app. Be sure to keep separate layers for the different source icons in case you want to move them around later.
Step 6: Save it
Be sure to keep the original .xcf, as this will retain the layer information. Then save copies as .png at the various resolutions you will need.
--
As you can see, it's still a somewhat long process, but with the steps hopefully it won't be too painful. Feedback is welcome: post here or at @gregstoll on Twitter. And if you're interested in getting started with Windows Phone development, and if you're in the Austin area, email me to get access to DVLUP!
Edit: Randall Arnold points out that Inkscape is a great free tool for doing vector art, which gives you much better quality (and resolution-independence).
--
See all my Windows Phone development posts.
I'm planning on writing more posts about Windows Phone development - what would you like to hear about? Reply here, on twitter at @gregstoll, or by email at ext-greg.stoll@nokia.com.
--
Interested in developing for Windows Phone? I'm the Nokia Developer Ambassador for Austin - drop me a line at ext-greg.stoll@nokia.com!
0 comments
This backup was done by LJBackup.

